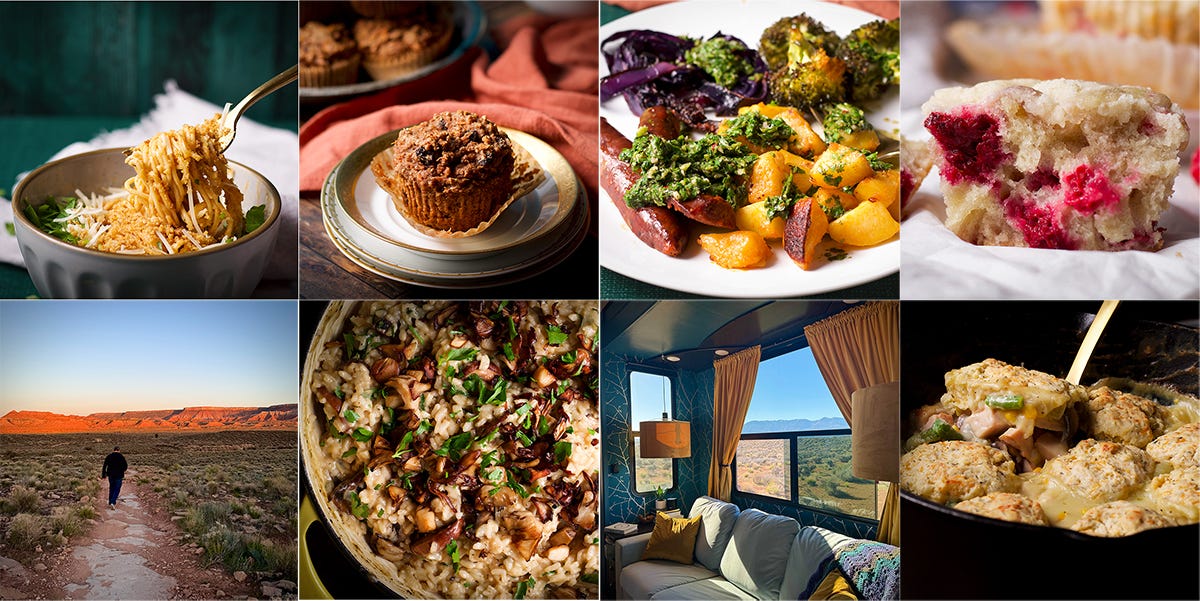
In this issue
+ When experience works against you and the week in photos
+ A few favorite boondocking recipes
+ Two New Recipes! Miso buttered pasta and Carrot bran muffins with no added sugar
+ No Recipe Required: Sheet pan chorizo, potato and vegetable dinner with chimichurri sauce
+ One Useful Thing: Soaking chicken in buttermilk
+ Featured Cookbook + an inspired recipe: The easiest mushroom risotto from The Blue Zones Cookbook
+ April Bake Club Challenge: Raspberry muffins
+ Reading, Watching, and Listening Recommendations
A quick note before we get to it, the length of this post means it might be truncated in your inbox – just click to expand and read the whole thing or read it directly on rebeccablackwell.com.
→ Read more about me what this newsletter is all about
I first heard the term “boondocking” when we began investigating the idea of living in an RV. If you’re not familiar with the word it’s basically dispersed camping on public land.
Camp spots are primitive, meaning there are no connections to running water, electricity, or sewer. The land is generally undeveloped with no bathrooms or outhouses, water pumps, or picnic tables. Most boondocking locations do not have paved roads. There are no reservations or assigned camping spots. You simply show up and find a place to park.
Both Steve and I were enamored with the idea of boondocking from the start. And just a couple of months after moving into our RV, Steve had installed solar power and made other modifications to our rig so we could live indefinitely without external power or water.
Over the past 4 years we’ve boondocked in many incredible places. We’ve learned that if we have sunny days, we’ll have enough power for whatever we need and when it’s cloudy we can run the generator.
We’ve learned how to stretch 100 gallons of fresh water for about 12 days before having to go get more.
And we’ve learned that some of the most beautiful spots to boondock are in Utah. And so, when I added Zion National Park to our 2024 travel itinerary, boondocking was a no-brainer.
And yet, when we first arrived to the area last weekend I was filled with anxiety about the whole thing.
One of the tricky things about boondocking is that you never know if there will be space for you. It’s first come first serve open camping and while we try to choose locations with lots of options at a time of the year when it’s unlikely to be crowded, you just never know what you’re going to find until you get there.
There are plenty of other unknowns, like road conditions or bridges with weight restrictions. (One time we chose an area that was down wind from a chicken farm and I couldn’t eat chicken for a long while after that. 🤢)
When we first started this life on the road, I felt more fearless about it than I do now. I would have thought the opposite would be true. Steve thinks we are just getting more risk adverse as we get older, and I’m sure that’s true, but also, I’m not as naive as I was in the beginning. I have a much better idea now of everything that can go wrong.
One of our all-time favorite boondocking experiences was at a place called The Wedge Overlook at The Little Grand Canyon in Utah. We pulled our 5th wheel into a spot that was right on the edge of the canyon and the view was incredible.
It was hands-down one of our favorite experiences. BUT, now that we’ve been there I know that there is really only one good spot for a trailer our size and we just happened to get it. If we visited that area again and it was taken, I’m not sure what we’d do.
Also, the road getting in and out was too rough and narrow for an RV as large as ours and we did some damage to our rig on that road. And backing out of the spot in the photo above required maneuvering the truck inches away from the edge of the cliff. 😱 All of it was 100% worth it. But now that I know what I know, I’ve hesitated to go back.
This month marks 4 years of RV living and we have a lot of experience dealing with the challenges and problems of life on the road. We are a good team and have met every difficulty, solved every problem, and gotten ourselves out of very sticky situations.
But sometimes the knowledge of what could happen gets to me.
In this case, my anxiety was completely unwarranted. We found a fantastic spot about 25 minutes from Zion National Park. We are surrounded by colorful cliff faces and wide open spaces. It’s peaceful and quiet and the view of the stars at night is breathtaking. It has reminded me that boondocking is worth the risk.
What about you, friends? Is there something in your life for which your knowledge and experience works against you instead of bolstering your confidence? Please share it with everyone in this little community in the comments below!
Do you nave more questions about boondocking? Check out this list of boondocking FAQs.
Curious about some of our other favorite places? Here is an ongoing list of our favorite spots so far.
The week in photos
After spending Sunday morning scouting our options, choosing a camping spot, and getting set up, we drove into Zion National Park. We only had a couple of hours before the park closed but that was enough time to get a feel for the park and an idea of what we want to do and see there. This weekend we’ll ride the motorcycle into the park and tackle one or two of the park’s more than hundred different hiking trails.
The area we are boondocking in also has a whole network of hiking and mountain biking trails and I LOVE being in a place where at the end of the workday all we have to do to go for a hike is walk out our front door. I also love having a view of wide open spaces out my windows. 🙂
There are a couple of quirky little towns nearby and we stopped into one of the restaurants and enjoyed a delicious meal on the patio. I’m hoping we have time to check out more of the local culture.
Favorite boondocking recipes
Since we are boondocking right now and several of these are on the menu, I thought I’d share with you a few of our favorite easy meals that don’t create a bunch of dirty dishes. (Which is kinda what I’m into right now even if we weren’t boondocking, as is evident in this issue’s new recipes.)
Here are a few of our favorites.
Sheet Pan Dinners. Scroll down for a recipe for chorizo and potato sheet pan dinner with chimichurri sauce but also here’s an anything-goes sheet pan dinner recipe that show you how to use whatever protein, veggies, and greens you like for an easy, no-fuss, one-pan way to make dinner.
Also check out these sheet pan Greek meatballs with homemade tzatziki sauce. Baking meatballs on a sheet pan in the oven means no frying mess and they cook in about 10 minutes.
Casseroles. Chicken enchilada verdes and black bean enchiladas are two of my favorite no-fuss meals. The sauce for both recipes is made from a jar of salsa verde and the filling requires a small handful of ingredients.
Cast iron dutch oven cooking. Dutch oven pot pie with cheddar thyme biscuits can be made with chicken or turkey and cooked in the oven or over a campfire. The creamy filling includes buttery potatoes, mushrooms, chicken or turkey, and whatever kind of frozen vegetables you like. And this Dutch oven chocolate cake is rich and buttery with a deep chocolate flavor and a texture that's so moist it's almost creamy. The cake is cooked on the stovetop - no need to turn on the oven!
Miso buttered pasta
Give me a bowl of homemade fresh pasta tossed with melted miso butter any day and I’ll be a happy camper. This dish takes minutes to prepare and is all kinds of creamy comfort in a bowl.
Two essential ingredients:
Pasta - I used homemade spaghetti noodles that I had cut and dried several days prior so they would be ready to cook when I was. But any kind of pasta works well in this recipe - spaghetti, angle hair pasta, fettuccini, penne, bowtie pasta, macaroni - whatever you like.
Miso butter - This is one of those culinary super foods that takes less than 5 minutes to prepare and makes nearly anything more delicious, but maybe especially pasta.
Nice-to-have ingredients:
Crispy garlic bread crumbs: Melt a couple of tablespoons of butter in a skillet and add a couple of minced cloves of garlic and about a cup of bread crumbs. Cook over medium heat, stirring constantly, until the bread crumbs are golden brown and smell toasty.
Chopped fresh Italian parsley, or any kind of fresh herbs
Grated parmesan cheese
Instructions:
Add just enough water to a large saucepan to cover the pasta and give it some room to move. (Keeping the amount of water to a relative minimum will ensure that the water contains a high level of starch from the pasta while it cooks. This will help to thicken the sauce.)
Add enough salt to the water to make it taste salty and set the pan over high heat. When the water is boiling, add the pasta and cook it until it’s slightly underdone.
Drain the pasta in a colander, reserving 2 cups of the pasta water.
Add the miso butter to a large saucepan or skillet, or a cast iron enameled braiser and set it over medium heat. Add 1 cup of the reserved pasta water, stir to mix with the miso butter and bring it to a boil over medium heat.
Add the pasta, tossing it around in the miso butter to coat. Cook, stirring frequently, until the pasta is fully cooked. Add more pasta water if the pan is looking dry. You want enough water to create a sauce but not so much that it starts to look soupy.
Remove from the heat and serve topped with fresh parsley, crispy bread crumbs, and grated parmesan.
Pasta + miso butter = a completely satisfying meal. But sometimes I like to add a few things to round it out a bit. Here are some ideas:
Toss in some grilled veggies, roasted veggies or sautéed veggies
Top bowls of noodles with roasted chicken, asian short rib meat, or pork carnitas
Add some chopped cherry tomatoes
Mushrooms! The crispy mushrooms in this recipe for cauliflower soup are incredible sprinkled over a plate of miso pasta. Or stir in a generous amount of mushroom ragu.
Add some grilled or fried crispy tofu
Top miso noodles with a handful of chopped fresh parsley and thinly sliced scallions
Whole Wheat Carrot Bran Muffins with No Added Sugar
These hearty whole grain muffins contain 18 grams of natural sugars, 6 grams of fiber, and just over 200 calories. They are sweetened with dates, carrots, and raisins, and contain no additional sugar.
But don’t let that fool you into thinking they aren’t delicious! Ingredients like toasted wheat bran, buttermilk, applesauce, cinnamon, ginger, vanilla, and almond extract pack these muffins with so much flavor you’ll forget they’re good for you.
Makes 12 muffins.
Ingredients:
6 ounces pitted dates (a generous 1 cup chopped)
1 cup buttermilk
2 large eggs
1 teaspoon pure vanilla extract
1 teaspoon almond extract
5 ounces (1 cup) raisins
1 cup wheat bran
1 1/2 cups whole wheat flour
1 teaspoon baking powder
1/2 teaspoon baking soda
3/4 teaspoon salt
2 teaspoons ground cinnamon
1/4 teaspoon ginger (optional)
1/3 cup unsweetened applesauce
1/4 cup extra virgin olive oil (or vegetable, canola, or coconut oil)
9 ounces grated carrots (1 1/2 cups packed)
Instructions:
Add the chopped dates and buttermilk to a blender and blend at high speed until completely combined. Add the eggs and the vanilla and almond extracts and blend on medium-low for a few seconds to combine. Add the raisins to the blender and use a spoon to stir them into the liquid so they are completely submerged. Allow the raisins to soak in the liquid for 1 hour. (*If you don’t like the consistency of raisins in muffins, puree them along with the dates. If you do this, there is no need to let them soak for an hour.)
In the meantime, add the wheat bran to a skillet and set it over medium heat. Cook, stirring constantly, until the wheat bran has darkened in color and smells toasty, about 5-6 minutes. Dump the toasted wheat bran into a bowl and let cool. (*Toasting the wheat bran deepens the flavor, but if you’re in a hurry, just skip it.)
Line a muffin pan with paper liners or grease the inside of the muffin cups with vegetable shortening or butter, or spray with non-stick baking spray. If your muffin pan does not have a non-stick surface, lightly grease the top of the pan so the tops of the muffins won’t stick.
Heat the oven to 350 degrees.
Add the toasted wheat bran, whole wheat flour, baking powder, baking soda, salt, cinnamon, and ginger to a mixing bowl and stir with a wire whisk to combine.
Add the applesauce, oil, grated carrots, and buttermilk-raisin mixture to the dry ingredients and stir with a wooden spoon or rubber spatula until everything is blended. It will be a very thick batter.
Divide the batter between the 12 muffin cups, mounding the batter in the cups so that it rises above the top of the muffin pan. (*See the photo below.)
Place the pan in the center of the oven and bake the muffins for 18 - 24 minutes, until a toothpick inserted in the center of one of the muffins comes out without any evidence of raw batter.
Allow the muffins to rest in the pan until cool enough to handle. Store in an airtight container at room temperature for up to 3 days. These muffins can also be frozen. I like to wrap them individually and place them in a ziptop bag before putting them in the freezer.
Sheet Pan Dinner with Chorizo, Potatoes, Veggies and Chimichurri Sauce
This meal requires little more than peeling and chopping and laying everything out on a baking sheet to roast. The chimichurri sauce lifts the whole thing far outside of basic territory even though chimichurri is a throw-it-together kind of sauce made in minutes in the food processor.
Here’s what you need:
Veggies. I used a sliced red cabbage and some broccoli florets
Potatoes. I prefer Yukon gold, but use whatever kind you like
Spanish chorizo. Spanish chorizo can be hard to find in some places. I found the links you see in the photo at Whole Foods. Be sure to not use dried chorizo. But any kind of sausage is great here - Italian sausage, bratwurst, Andouille, and even polish sausage.
Oil - vegetable, canola, or extra virgin olive oil - and/or butter
Chimichurri sauce. This bright, fresh sauce is made by adding fresh herbs, garlic and spices, vinegar and oil to a food processor and blending. It’s easy to adjust the flavors to your personal preferences. For example, we are vinegar lovers around here, so our chimichurri always includes a healthy dose.
The key to sheet pan dinners is to not add everything to the pan at once. Different ingredients require different cooking times. (Check out this recipe for the ultimate mix-and-match sheet pan dinner.) Also, how well-cooked everything is depends on your personal tastes.
Steve and I LOVE vegetables that are cooked at very high heat until they are a bit charred on the outside. So, I cooked the cabbage and broccoli first, heating the oven to 450 degrees, so they’d have time to get a bit crispy.
I also prefer to boil potatoes before roasting or frying them. Just like with these crispy fried potatoes, boiling them for a few minutes first results in potatoes that are soft and creamy on the inside, and golden and crispy on the outside.
Here’s the basic process:
Line a sheet pan with foil or parchment paper and heat the oven to 450 degrees.
Toss your veggies with enough oil (or a combination of oil and melted butter) to coat them lightly. Spread them out onto the baking sheet and sprinkle with salt and pepper. If using cabbage - slice it as in this recipe for roasted cabbage.
Peel and chop the potatoes into bite size pieces and add them to a pot with enough water to cover and enough salt to make the water taste salty. Set the saucepan over high heat and bring the water to a boil. Cook the potatoes until they are soft enough to pierce with a fork, but with resistance. You want them to be underdone.
While the potatoes boil, put the sheet pan with the veggies in the oven to start roasting.
Drain the potatoes and toss them in a bit of oil and/or butter. Remove the sheet pan from the oven and add the potatoes and sausage.
If the sausage you are using releases some oil while cooking, remove the pan from the oven and smear the potatoes around in the oil because, YUM.
Remove the pan from the oven when everything is cooked to your liking and serve with chimichurri sauce on the side so everyone can add as much as they like.
Soaking Chicken in Buttermilk
I started soaking chicken in buttermilk and salt years ago after reading Salt, Fat, Acid, Heat and haven’t looked back.
There’s a recipe in the book for roast chicken that includes soaking the bird in a buttermilk and salt bath for 24 hours before roasting. The salt and acid in the buttermilk work together to flavor and tenderize the meat and prevent liquid from escaping while the bird cooks. As a little bonus, the sugars in the buttermilk caramelize while the chicken cooks, creating a gorgeous dark brown skin.
The end result is a super tender, flavorful, and juicy roast chicken that still requires very little hands-on time. (You can read more about this method for perfectly roast chicken here: How to Roast a Chicken)
Since discovering this technique, I now soak chicken in buttermilk on the regular, not just whole birds. The exception to this is when I want to quickly poach boneless, skinless chicken breasts or thighs so I have some cooked chicken meat to use in another recipe.
Here’s what to do:
Add chicken to a ziptop bag or other covered container that’s large enough to hold the chicken comfortably.
Sprinkle the chicken with a very generous amount of salt - when I say generous, I mean it. The salt will get diluted by the buttermilk. You want to add enough to feel certain that the buttermilk will be quite salty.
Pour in enough buttermilk so the chicken is completely submerged.
Place the container in the refrigerator and let the chicken soak for at least 12 and up to 24 hours.
When you’re ready to cook the chicken, remove it from the buttermilk and use a paper towel to sponge off the excess liquid. That’s it. The chicken is ready to cook!
No buttermilk? No problem! Here are 7 terrific DIY buttermilk ideas.
This month’s featured cookbook is The Blue Zones Kitchen Cookbook by Dan Buettner. This book is a collection of recipes from the regions covered in The Blue Zones: Lessons From the Healthiest Places on Earth.
One of the recipes in the book that immediately captured my attention is Porcini Mushroom Risotto. The recipe originates from Sardinia, Italy and does not contain most of the fat and cream of traditional risottos.
The other thing I loved about the recipe is the method. It’s extremely low maintenance. Most risotto recipes require you to stand at the stove and stir the entire time the risotto cooks, adding the liquid bit by bit. In this recipe, the liquid is added all at once and all that’s required from the cook is to stir every now and then.
Even though it doesn’t contain any cream, this risotto is delightfully rich and creamy tasting. It eats like something completely indulgent, but is light and packed with meaty mushrooms. It also reheats well, so if you have leftovers count yourself lucky.
Mushroom risotto
This recipe was adapted from The Blue Zones Kitchen Cookbook.
Makes 6 main dish servings.
1 1/2 pounds mushrooms, any kind - I used cremini mushrooms plus one Maitake mushroom (more about that kind of mushroom below)
2-4 tablespoon canola or vegetable oil
2 tablespoons butter
Salt and ground pepper
Juice from 1 large lemon
1 small yellow onion, diced
2-3 cloves garlic, minced
2 teaspoons dried Italian seasoning
2 1/2 cups arborio rice
6 cups vegetable broth - I used Better than Bouillon Mushroom Base mixed with 6 cups of water. You can also just use plain water.
1/2 cup chopped parsley
3-5 ounces grated parmesan cheese - it’s up to you how much you want to add
Slice the mushrooms into 1/4 to 1/2 inch slices, or chop into 1-inch pieces.
Add the butter and 2 tablespoons of the oil to a large skillet and set it over medium heat. When the butter has melted, add the mushrooms. Stir the mushrooms around in the pan to coat with the fat then sprinkle with salt. Cook, stirring frequently, until the mushrooms have caramelized to a rich dark brown. (*You may need to do this in batches to avoid overcrowding the pan. If the pan looks too dry, add more butter and oil.)
Transfer the mushrooms to a bowl and squeeze in the lemon juice. Toss the mushrooms in the lemon juice and set aside.
Add 1 tablespoon of oil and the diced onions and minced garlic to a large saucepan, dutch oven, or braiser. Set the pan over medium heat and cook, stirring frequently, until the onion is starting to look translucent. Add the Italian seasoning and the rice and cook, stirring constantly, for another 2 minutes to toast the rice.
Pour in the broth (or water). Turn up the heat and bring the liquid to a boil, then lower the heat to maintain a gentle simmer. (*If you are using unsalted or low sodium broth or plain water, you’ll want to add a bit of salt.)
Cook, uncovered, stirring often, until the rice is done. The rice will absorb most of the water as it cooks; if the pan starts to look too dry, add a bit more broth or water. You want the consistency to be creamy, not dry or soupy.
Stir in the sautéed mushrooms, chopped parsley and cheese; taste for salt and add ground black pepper to taste.
Drizzle with a bit of extra virgin olive oil to finish (I like to drizzle individual servings with olive oil.)
We ate this with roasted cauliflower and cabbage and the combination was fantastic. If you’d like to do the same, here’s what to do:
Heat the oven to 450 degrees and line a baking sheet with foil or parchment paper. Trim the bottom and core from the cabbage. Cut the cabbage in half, crosswise. Then cut each half into three thick slices. (For a visual on this, check out this recipe for simple roasted cabbage.)
Lay the cabbage on the baking sheet and brush both sides of it with a generous amount of oil and/or melted butter. Sprinkle with salt and pepper.
Toss some cauliflower florets with enough oil and/or butter to coat lightly, then add them to the baking sheet and sprinkle with salt and pepper.
Roast until the edges of the cabbage slices are brown and crispy, and the cauliflower is blacked in places, about 30 minutes.
This mushroom risotto would also be delicious made with mushroom ragu. Simple prepare the ragu instead of the caramelized mushrooms and then stir it into the rice in step #7.
I came across a Maitake mushroom while shopping at a little grocery store in Reedsport Oregon. (The checker was fascinated by it and we held up the line for a bit talking about what it might taste like. No one seemed to mind. Small towns are not in a hurry.)
The name is Japanese and means “dancing mushroom”. It is thought to have powerful medicinal qualities and contains high levels of vitamins and minerals that support our immune system.
This was my first time cooking a Maitake mushroom and I loved its rich, woodsy flavor. Rather than mix it into the risotto with the other mushrooms, I chopped it into pieces, sautéed it in butter, and then sprinkled the pieces over the top of the risotto right before serving - so that’s what you see in the photo.
Have you every cooked with this mushroom before? Leave a comment below if you have and tell me what else you like to do with it!
The bake club is a monthly baking challenge with a chance to win a $50 Amazon gift card. To participate simply bake the challenge recipe and leave a comment on the recipe telling me what you thought of it. By commenting on the recipe, you'll be automatically entered to win a $50 Amazon gift card.
Important: When you comment on the recipe, use the same email address that you use to subscribe to this newsletter. This is how I’ll contact you if you win.
The March bake club winner is Helen Maes, who has already been notified. Congratulations Helen!
The April challenge recipe is Raspberry Muffins!
Raspberry muffins are rich, decadent, and buttery little breakfast pastries packed with berries. The crumb is exceptionally soft and tender, a perfect match for delicate, sweet raspberries. And the butter crumb topping literally melts in your mouth.
To participate in the Bake Club Challenge: bake this month's challenge recipe and then leave a comment on the recipe telling me what you thought of it! By commenting on the recipe, you'll be automatically entered to win a $50 Amazon gift card. Bake the challenge recipe and leave your comment before May 1st, 2024.
What I’m reading, watching, and listening to
I’ve got two documentary recommendations for you this week. I watched both on HBO Max so apologies for those of you who don’t have that option but perhaps they are available elsewhere. They are both worth seeking out!
The Automat. I heard director Lisa Hurwitz interviewed about this film on the Milk Street Radio podcast a few weeks ago and just watched the documentary this week. I had never heard of an Automat and now wish I had lived in a time and place where I might have had a chance to experience it.
The restaurant was basically a giant vending machine, but in beautiful art deco buildings, with good food eaten on real plates. People would put their nickel in a slot and out would come a serving of chicken pot pie or baked mac and cheese or slice of pie. Coffee was poured out of dolphin spouts. For decades people felt like it was a magical experience.
What really made an impact on me was commitment of the founders to create a space for everyone. The Automat attracted people from every economic and cultural class and that was one of the reasons people loved it.
This film is worth the watch. It made me wonder where more of these pockets of comfortable inclusivity live in the world today? It also made me long for some of the elegance of the past.
Becoming Mary Tyler Moore. I started watching this on the airplane on the way home from Costa Rica but didn’t get to finish it. I was thrilled to find it on HBO Max and finished watching it this week. I was fascinated by Mary’s remarkable life and her cautiously open and optimistic yet pragmatic expectations for her life and her career.
Mary, who had already lost her sister to suicide, also lost her 24 year old son to a gun.
But the film is about more than Mary’s life. It’s about 6 decades of cultural expectations of women and how things have and haven’t changed. Not for the first time, I found myself feeling grateful for the women who’ve come before me, who have pushed boundaries and changed perceptions, and helped to clear the path a bit for the rest of us. Also, we still have work to do.
Thanks for reading! Paid subscribers receive three issues a month and have access to the full recipe archives, so if you are enjoying this newsletter, please consider upgrading your subscription for $5 a month or $50 a year.
If you make something from this issue, have any questions or anything you’d like to share, add a comment below. I ❤️ to hear from you. And if you are enjoying this newsletter, please tell your friends!
Agree, definitely on visit list, though I've been to other parts of Italy many times. I will give it a try! Too a cooking class in Rome from a woman who spends every August in Sardinia...lucky her!
Rebecca--confused about your risotto comment. I rarely, if ever, add cream to risotto. The rice produces the creamy texture when broth is properly , i.e., slowwwly...., absorbed into the rice. Sometimes I add a lump of butter at the end for richness, but I don't think true Italian risotto contains "most of the fat and cream of traditional risottos". Perhaps chefs want to add an over the top richness to a dish that doesn't really need it? The Sardinians got it right in your recipe today.