


In this issue
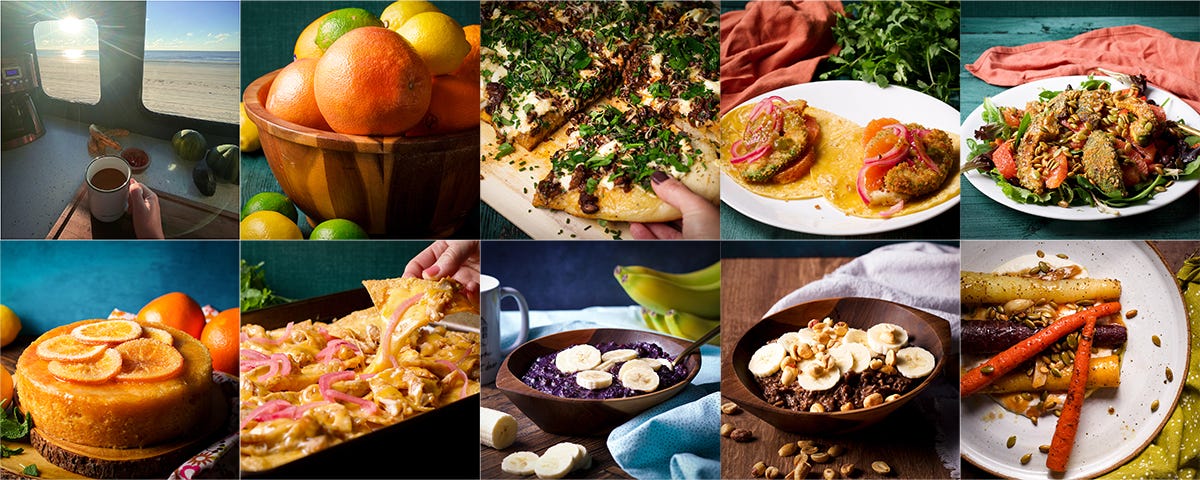
+ We do not have to believe our own bullshit
+ Recipes for citrus lovers
+ New On The Blogs: Creamy mushroom pasta, mushroom pizza, and homemade pizza dough
+ Three Exclusive New Recipes! Crispy avocado tacos, Avocado, citrus, and pumpkin seed salad, and the lightest, softest citrus drizzle cake I’ve ever eaten.
+ No Recipe Required: BBQ chicken nachos
+ One Useful Thing: Two high protein and nutrition packed ways to make oatmeal that feels like eating dessert for breakfast
+ Featured Cookbook: roasted carrots with ricotta from How to Dress an Egg
+ Reading, Watching, and Listening Recommendations
A quick note before we get to it, the length of this post means it might be truncated in your inbox – just click to expand and read the whole thing or read it directly on rebeccablackwell.com.
→ Read more about me what this newsletter is all about

“I will take my mind out of its iron cage and let it swim.”- Virginia Wolf
This time last year, we were camped on the Texas gulf coast, parked right on the hard packed sand of Crystal Beach with the sound of ocean waves as our constant soundtrack. We had intended to stay for 2 weeks and ended up staying for 7. (If you’re curious about what that was like, I wrote about that experience here.)
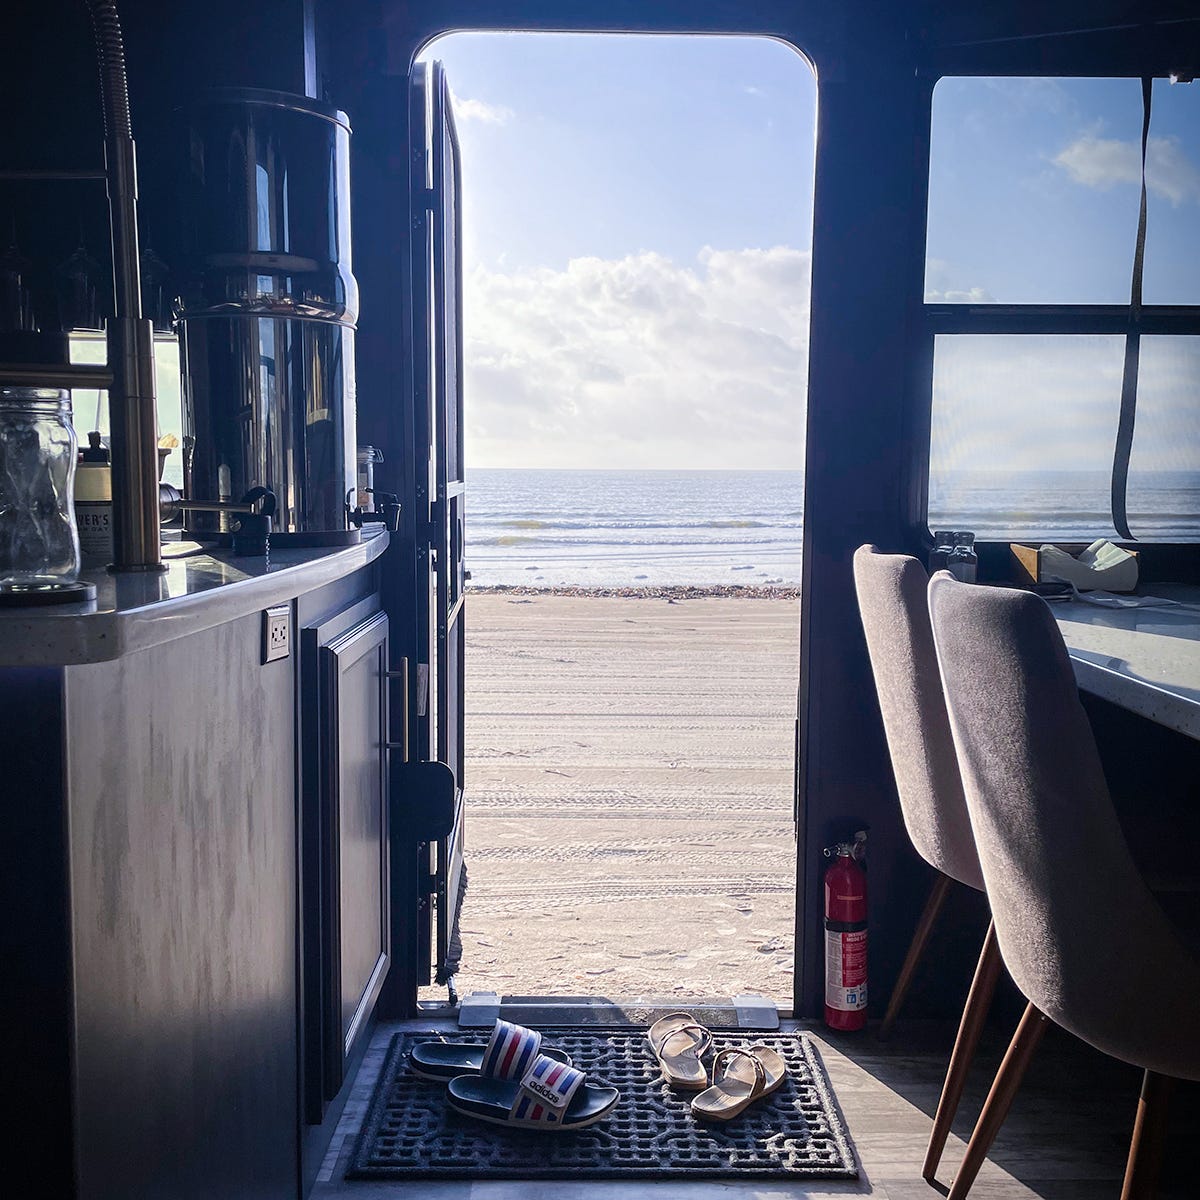
The first week there I got up early and went for a morning walk just as the sun was starting to rise over the water and got caught in a conversation with another camper. I shared that conversation with some folks back then and wanted to share it with you now because it taught me a lesson that I am currently still trying to learn. Here’s what I wrote last year…
While on my morning walk today, a man camped on the beach started a conversation with me. “Conversation” is probably not the right word. More accurately he talked AT me for a few minutes while I contemplated my escape.
He railed against the world for all of its ineptitude while simultaneously telling me all the ways in which he was smarter, tougher, and just generally better than “all those sissys” who can’t get their shit together. I determined that there was no polite way to escape this encounter (and honestly, why did I even care about being polite???) and just started walking away.
As I did, I said, “It sounds like you’ve got it all figured out. Too bad you’re surrounded by a world full of idiots.” He shouted after me that he doesn’t have it all figured out and the good lord teaches that we should show love and kindness to everyone and that’s what he’s “TRYING TO DO GODDAMMIT!”
Love and kindness wasn’t exactly the vibe I was getting from him. The problem is, he believes all his own stories and tells them on repeat. And for the rest of my walk, I thought about the one important lesson this man taught me:
Freedom is realizing you don’t have to believe your own bullshit. Or anyone else’s.
So here I am a year later still trying to not believe all my own bullshit. Dang, it’s hard.
Our thoughts are not the truth of things. They are not facts. A lesson I must continue to learn is that I do not have to believe all my own thoughts. This is different from ignoring them or trying to hide the most difficult thoughts in some isolated corner of my mind in a futile effort to pretend they’re not there.
In fact, the best way I know to deal with painful, difficult thoughts is to bring them fully into awareness. To shine a spotlight on them and not only acknowledge their existence, but allow them to take center stage.
In doing so, it is sometimes possible to see the thought for what it is - as just a thought.
Likewise, the narrative of who I am and of who I think others are is not the truth. They are just stories, constructed in my mind.
What I’m trying to say is, we’d do well to hold the stories we tell ourselves loosely.
On that note, let’s talk about food.
Recipes for citrus lovers
We’ve been deep into citrus season for a while now and honestly, it’s one of the best things about winter. I know January and February can be kinda bleak but I love the fresh start feeling of the first couple months of the year and also, we have citrus fruit.
I keep a huge bowl of citrus fruit on the table from around October through March and in addition to eating it straight from the bowl, I juice it and add it to everything from salads and tacos to cake.
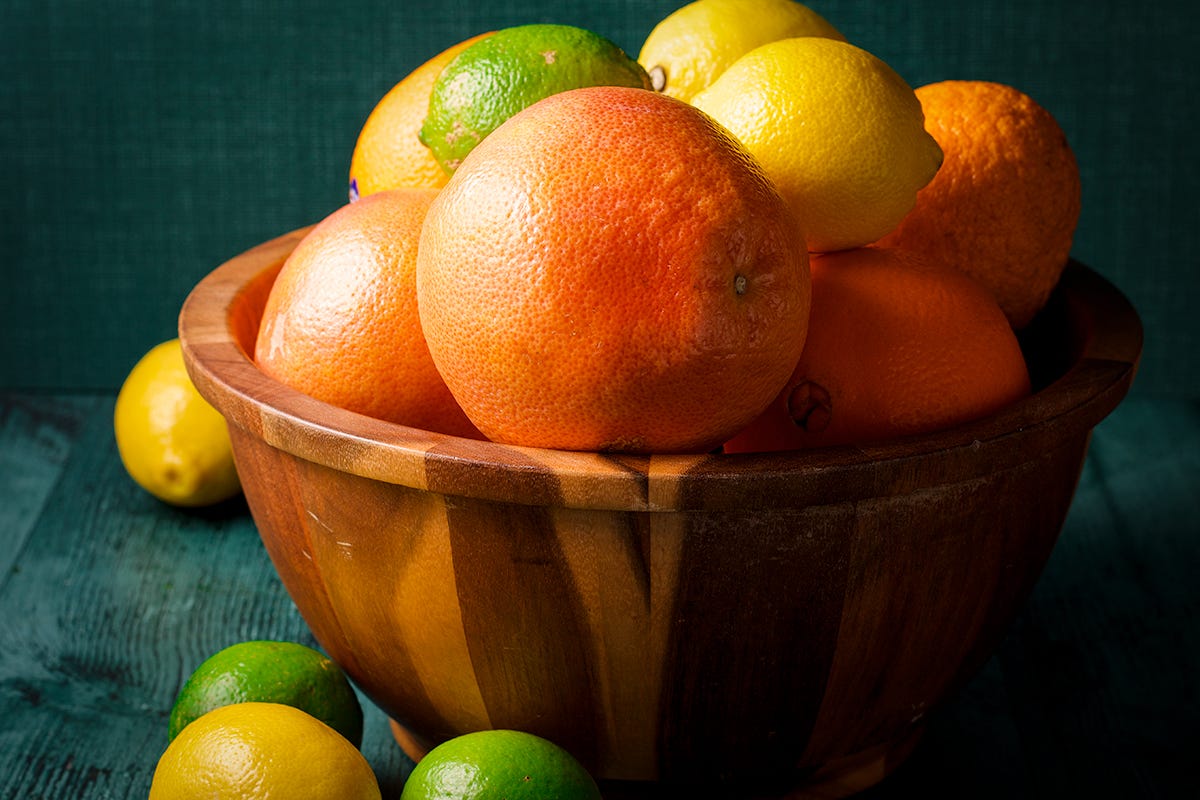
In this issue you’ll find two recipes that include crispy panko crusted avocados - one for tacos and one for salad, both including slices of juicy, sweet CaraCara oranges. And also, the most delicious, sloppy, sticky citrus drizzle cake.
Here are a few of my other favorite ways to make the most of citrus season:
New on the blogs
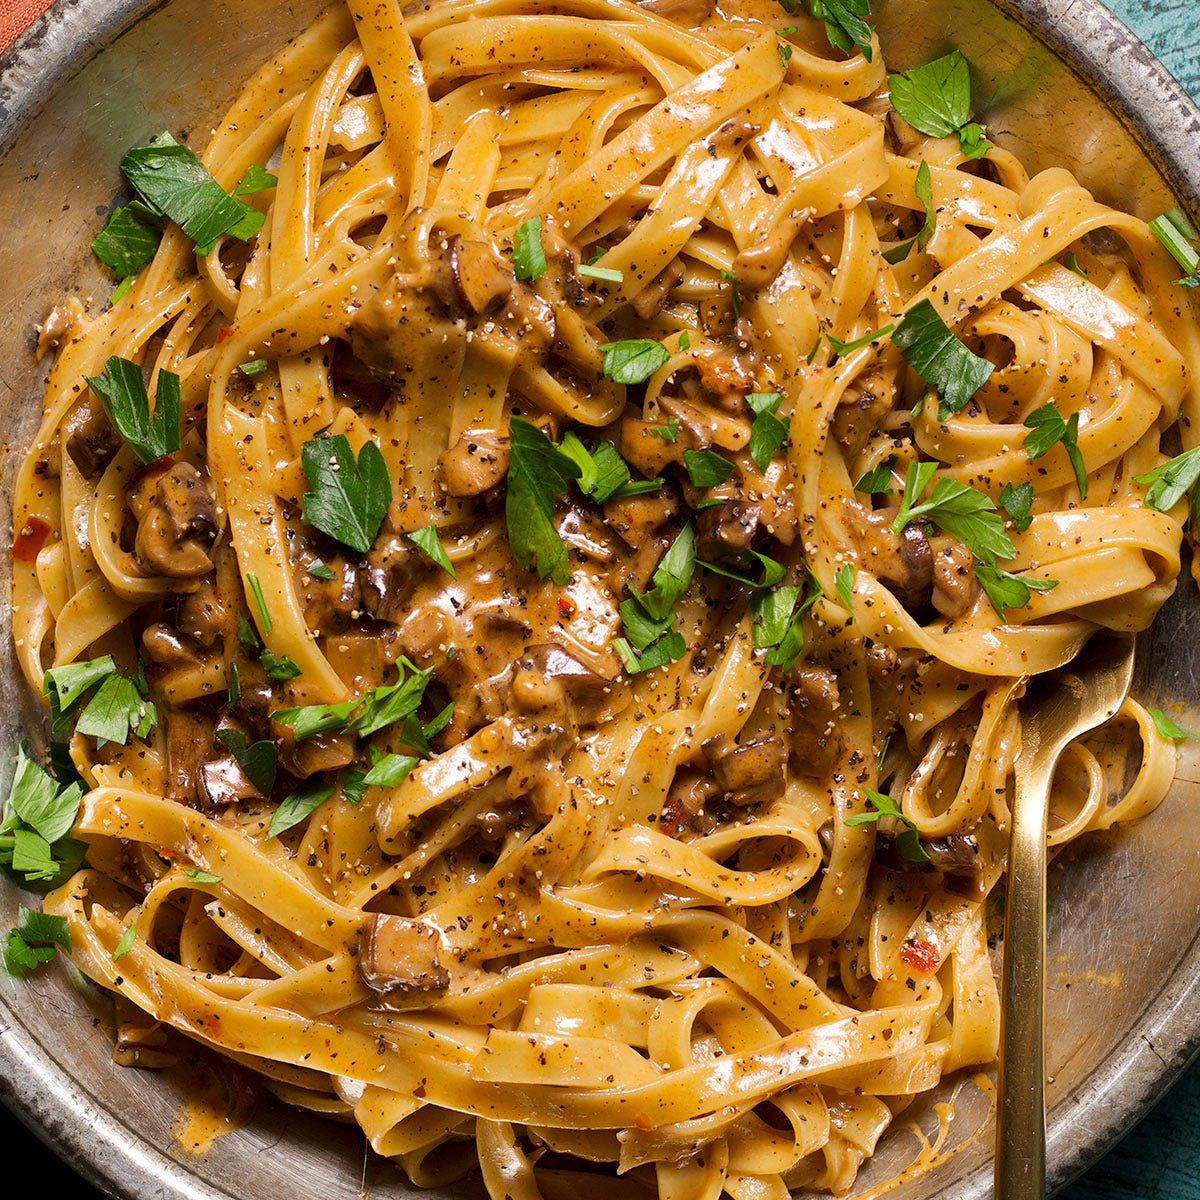
Love is the way I feel about this plate full of creamy, cheesy, saucy, perfectly cooked pasta and roasted mushrooms topped with plenty of cracked pepper and fresh herbs.
Just to be perfectly clear here, when I say I love this plate of pasta I am not speaking metaphorically. I love and adore it with each and every silky, creamy, earthy mushroom bite.
And I promise that all of you all you fellow pasta and mushroom lovers will also fall head over heals for this dish. I know because I am you.
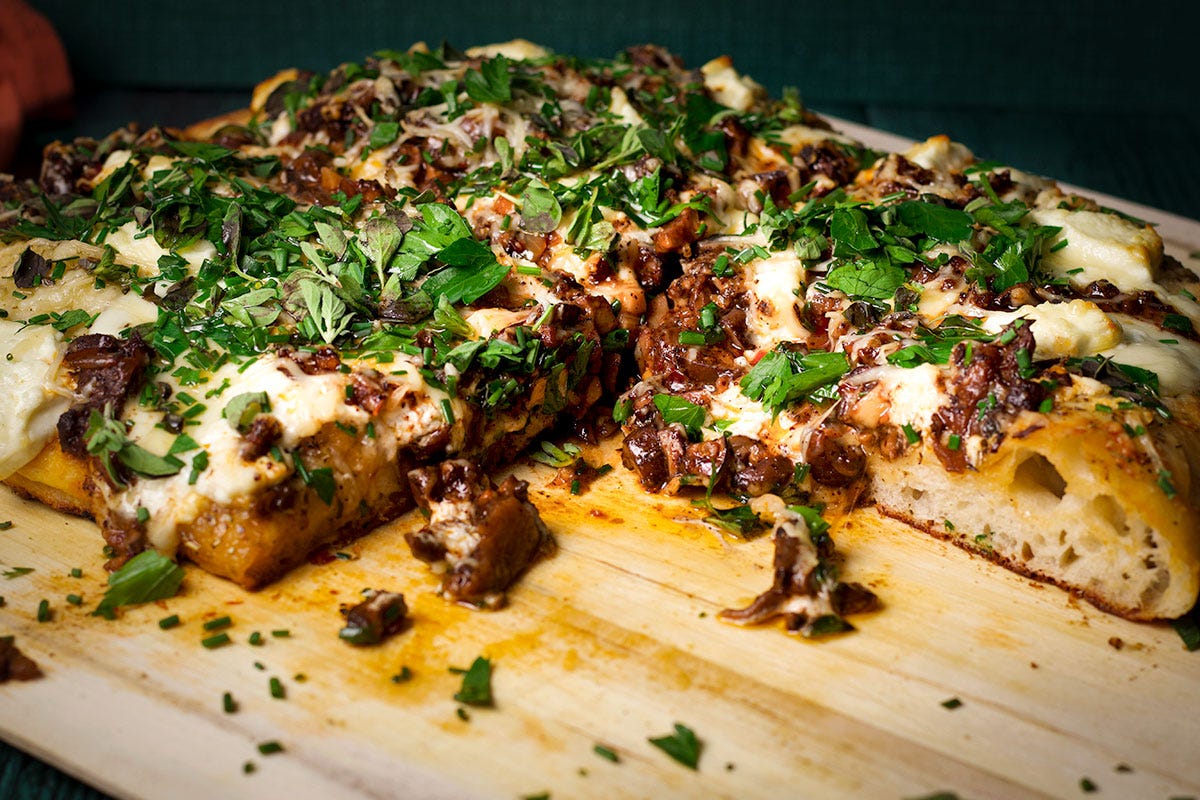
My oh my. This homemade mushroom pizza is a stunner. It deserves your complete, undivided, wholly devoted love and adoration. This will not be difficult or a sacrifice, believe you me.
It’s the kind of thing you make when self care means an evening at home tucked in with rich and cozy, deeply comforting, simple-meets-decadent, cheesy, saucy mushrooms on a soft and chewy homemade pizza crust dripping with truffle oil and roasted garlic.
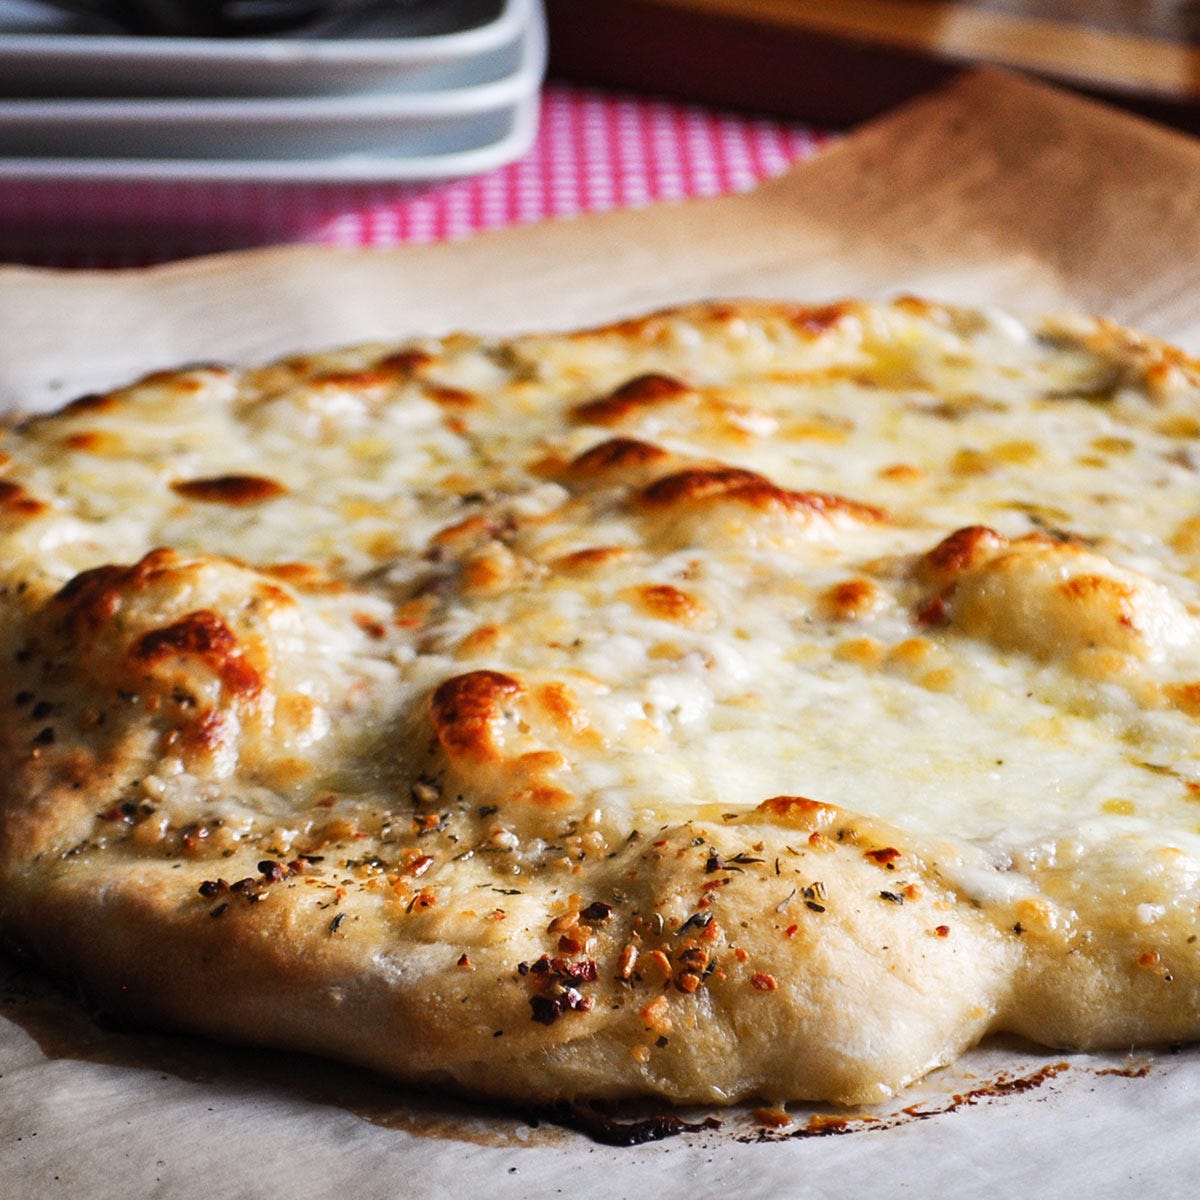
Homemade pizza dough. Ok, so this recipe has actually been on the blog since 2020 but it recently got a refresh so I wanted to share it with you in case you haven’t seen it yet. I’ve been making this recipe for decades, tweaking and testing and trying new things until I arrived at a recipe that is flavorful and chewy and super reliable and easy to make.
One of the best things about the recipe is how easy it is to adapt pizza making to your schedule. Start to finish, the dough will take about 2 hours - this is not hands on time, mind you. The hands on time is minimal but as with any yeast-risen dough, it needs time to proof (rise).
But, you can stretch the process out for an additional 12-24 hours if you like. So, for example, you can mix up the dough in the morning and then leave it in the refrigerator all day. That evening, pull the dough from the fridge, roll it out, add your toppings, and bake.
The dough can also be frozen. When I make pizza for my husband and I, divide the dough in half, using one half to make pizza that day and putting the rest in the freezer for another time.
Reminder: This month’s Bake Club Challenge is Oatmeal Raisin Cookies
To participate in the Bake Club Challenge: bake this month's challenge recipe, classic oatmeal raisin cookies, and then leave a comment on the recipe telling me what you thought of it! By commenting on the recipe, you'll be automatically entered to win a $50 Amazon gift card. Bake the challenge recipe and leave your comment before March 1st, 2024.
The rest of this issue, which includes 6 new recipes, is for paid subscribers. Subscribe now for just $5 a month. Or, stick to the free plan and I’ll see you next month with two new issues! ❤️

Crispy fried avocado tacos
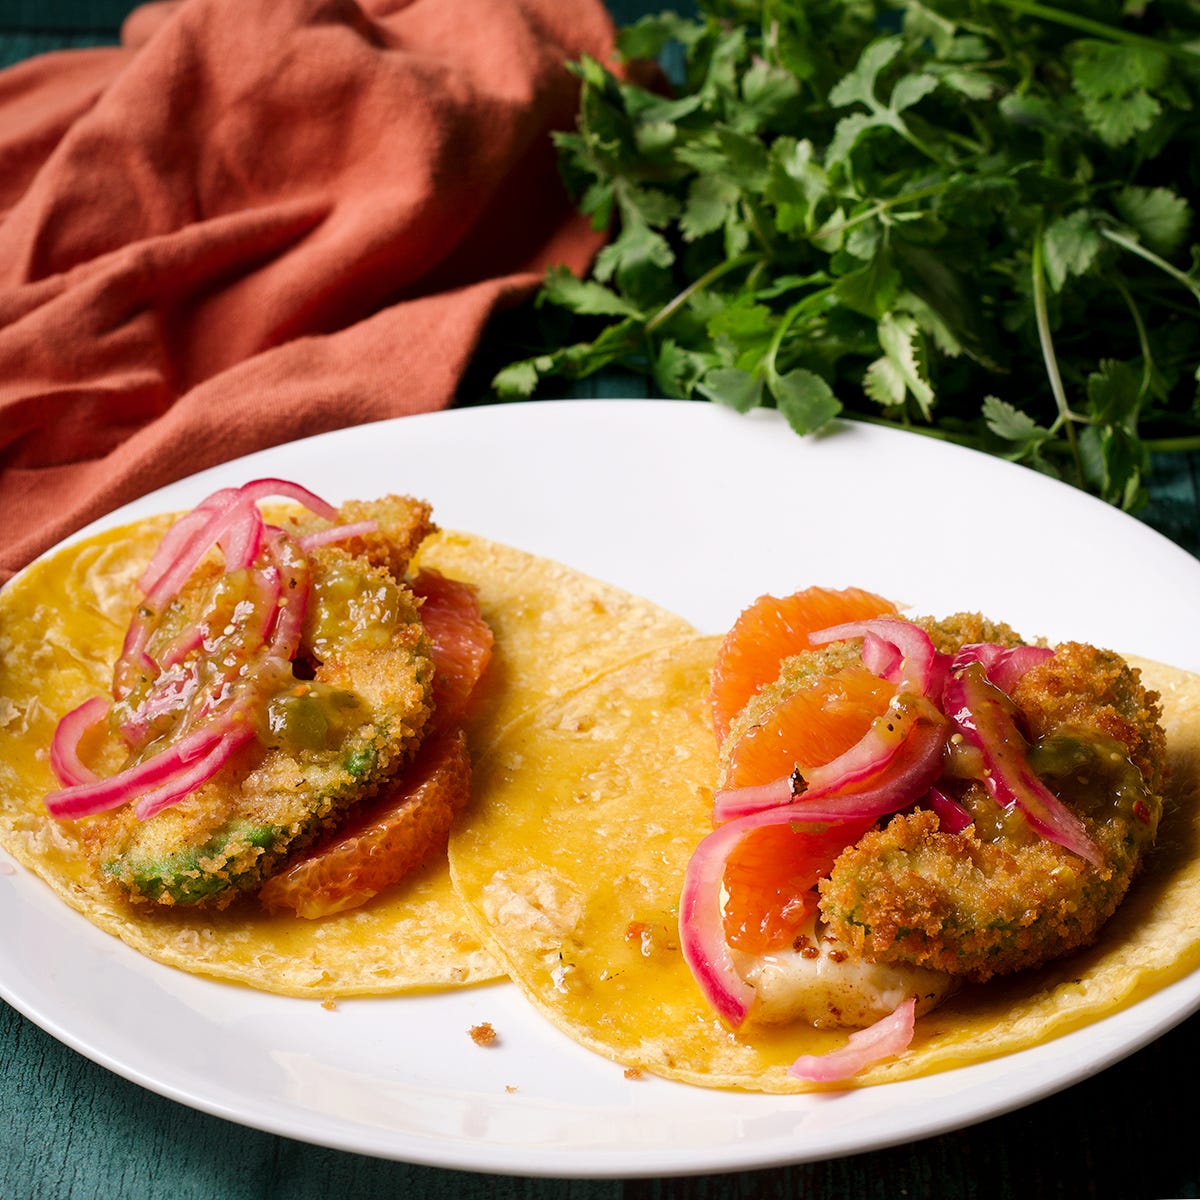
If you’re an avocado lover, you’re probably going to want to add these tasty little tacos to your plan for the week. This is the kind of recipe that you can easily scale to make as many tacos as you need, from two to twenty. And the combination of crispy panko and creamy avocado + cheese + all the bright fresh flavor from orange slices, quick pickled onions, and salsa verde is just plain dreamy.
Ingredients:
Corn tortillas
Vegetable or canola oil
An avocado or two - or however many you need for the number of tacos you want to make
Chili powder, salt, and pepper
For the breading: Panko bread crumbs, all-purpose flour, an egg or two
Cheese: Cotija, Queso Fresco, Machego, or Oaxaca
Orange slices (I used CaraCara oranges): use a sharp knife to cut the peel from an orange and then cut each segment away from the segment wall (seperate the fruit from its “skin”)
Salsa verde - We like Herdez
Brush the corn tortillas with a little bit of oil and stack them on a microwave safe plate. Cover with a damp paper towel and set aside.
Cut the avocado in half, remove the peel and the pit, and cut each half into 1/2-inch thick slices. Spread the slices out on your cutting board and sprinkle them on both sides with chili powder and a generous amount of salt and pepper.
Add about a cup of panko bread crumbs to a plate, dump a couple tablespoons of flour onto a separate plate, and crack an egg or two into a bowl. Add a teaspoon or two of water to the eggs and whisk to combine.
Working with one avocado slice at a time, dredge each slice in flour, dip it in the eggs, then coat with panko bread crumbs. When coating with panko, use your fingers to really press the bread crumbs into each slice so you get a nice thick layer. Lay the breaded slices out onto a plate.
Pour enough oil into a large skillet to come up the sides of the pan about 1/4 of an inch and set it over high heat. When the oil is very hot, use metal tongs to add the breaded avocado slices to the pan. (To test that the oil is hot enough, dip one corner of a breaded avocado slice into the hot oil. If it sizzles, the oil is hot enough.)
Cook the avocado slices in the oil, turning them every once in a while, until they are a rich golden brown. Remove the slices to a paper towel lined plate.
Place the plate of tortillas in the microwave and heat for 45 - 60 seconds to warm.
To serve: lay a couple of tortillas on a plate and add some cheese. Top the cheese with a couple of fried avocado slices, then a couple of orange slices, some pickled onions, and a spoonful of salsa verde.
Recipe notes:
There is no need to try and keep the avocado slices warm. The tacos are perfectly delicious at room temperature.
You can skip the flour and egg and simply season the avocado slices before coating them directly with bread crumbs. The downside is that the avocado slices will not be as firm after they are fried. In fact, they get kind of mushy. This isn’t necessarily a bad thing, but I prefer the firmer texture of the slices that have been breaded with flour and egg.
The point of brushing the corn tortillas with oil and then microwaving them is to soften them so they don’t break in half when you fold them over into a taco. You can also do this in the hot oil left in the pan after frying the avocados. Simply keep the oil over high heat and use metal tongs to dip the tortillas, one at a time, in the hot oil, flipping them over after 2 or 3 seconds, then removing them from the pan to drain on a paper towel.
Not sure what I’m talking about when I say to cut the fruit from it’s skin? Here’s a video of someone doing exactly this.
Crispy fried avocado and citrus salad
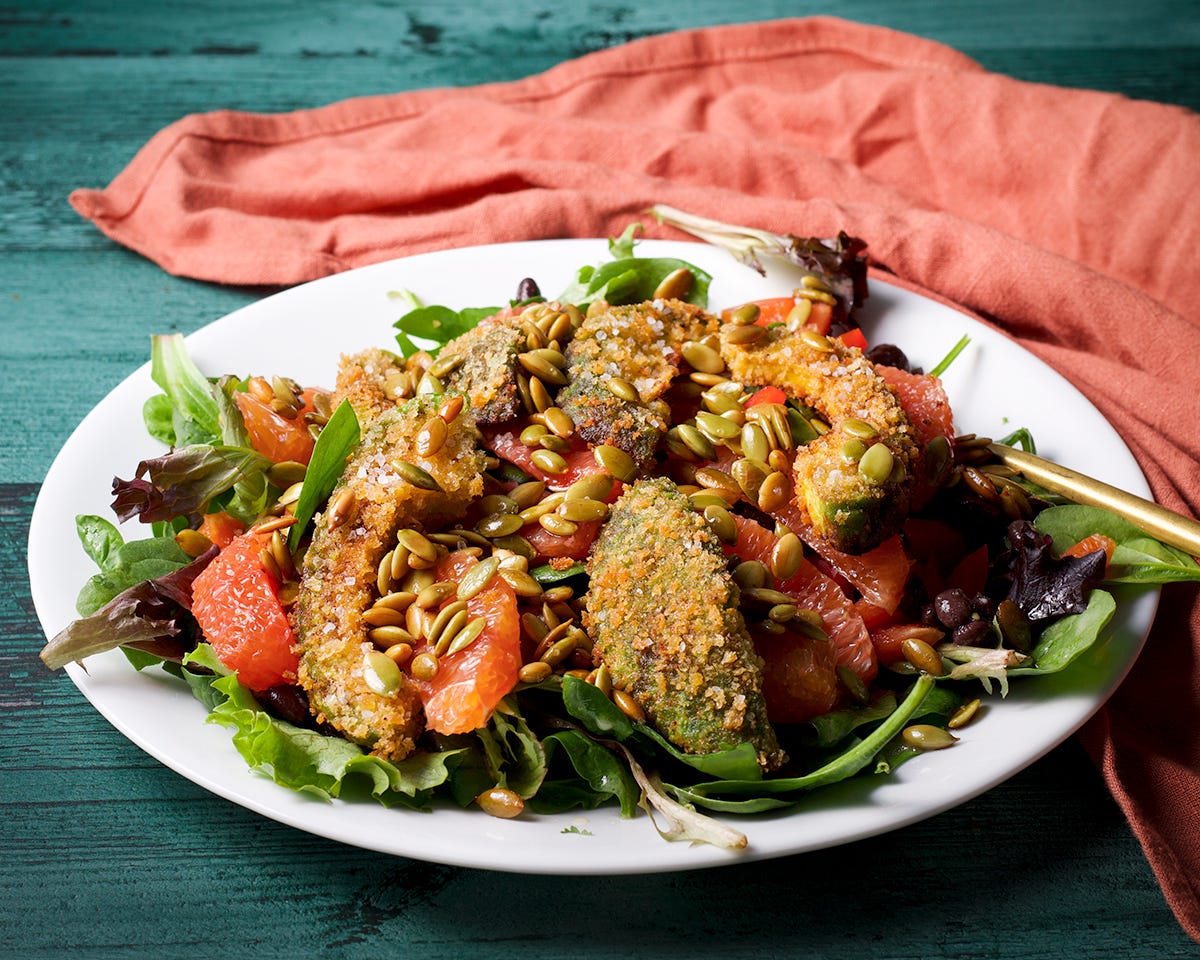
We loved the crispy fried avocados in the tacos above so much that I made some more the next day and added them to a salad. Here’s how to make this salad:
Whisk up a quick citrus vinaigrette. Check out last week’s issue for a basic vinaigrette formula and a couple of hacks for getting all the ingredients to come together a they should. For this salad, I used lime juice, a diced shallot, honey, about a teaspoon of mayonnaise, salt, pepper, and extra virgin olive oil.
Follow the instructions in the taco recipe above to bread avocado slices and fry them in hot oil until golden and crispy.
Use a sharp knife to cut the peel from an orange and then cut each segment from the segment wall (the “skin” around each segment).
Add salad greens to a plate and drizzle the greens with vinaigrette. Lay a few slices of orange and a few crispy avocado slices over the greens then top with toasted, salted pumpkin seeds.
*To toast pumpkin seeds: add the seeds to a skillet along with enough olive or canola oil to coat the seeds. Sprinkle the seeds with salt and then cook the seeds over medium heat, until about half of them are brown. Stir often while the seeds are cooking to prevent burning.
Citrus drizzle cake
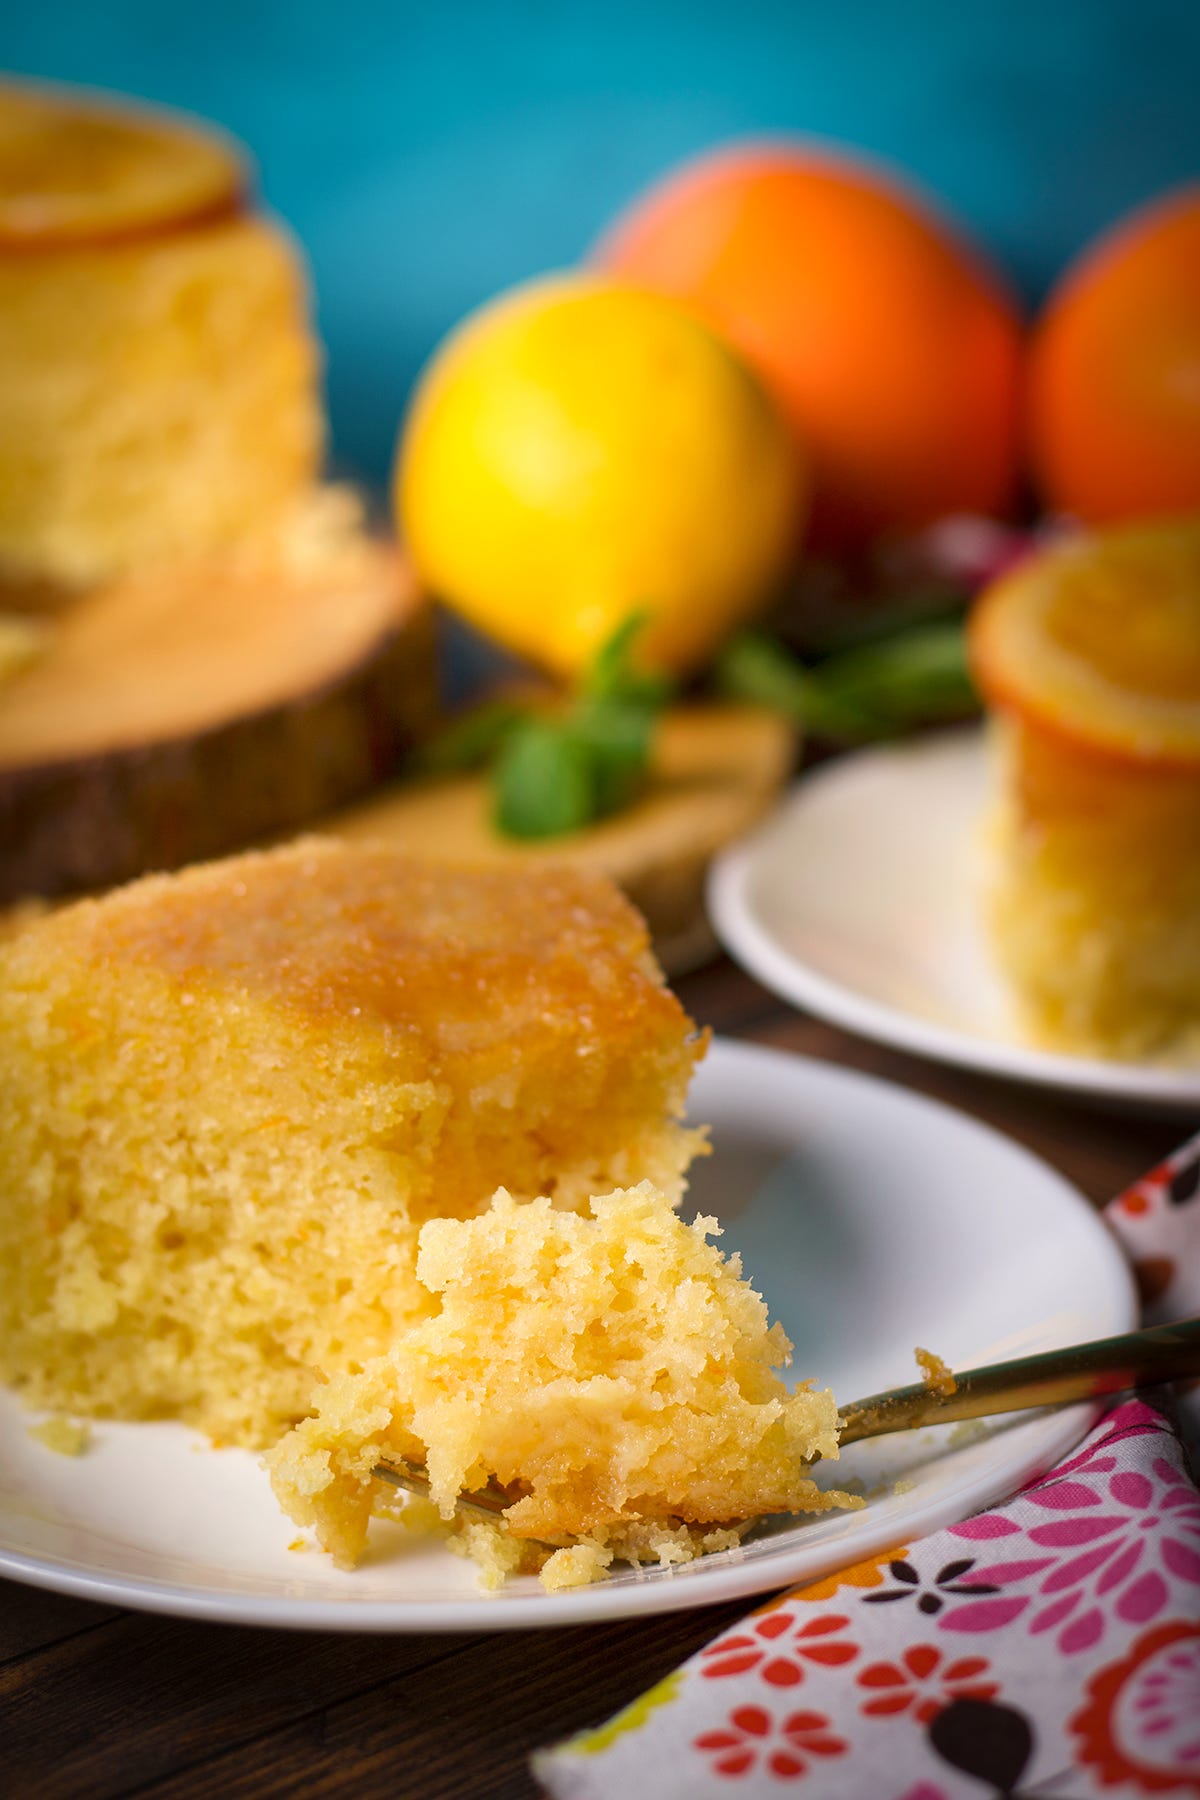
This cake is pretty much all I want to eat from now until fresh berry season. It is quite possibly the lightest, softest cake I’ve ever eaten and bursting with citrus flavor. The cake includes actual fruit - 2 whole lemons and an orange, or whatever combination of citrus fruit you like.
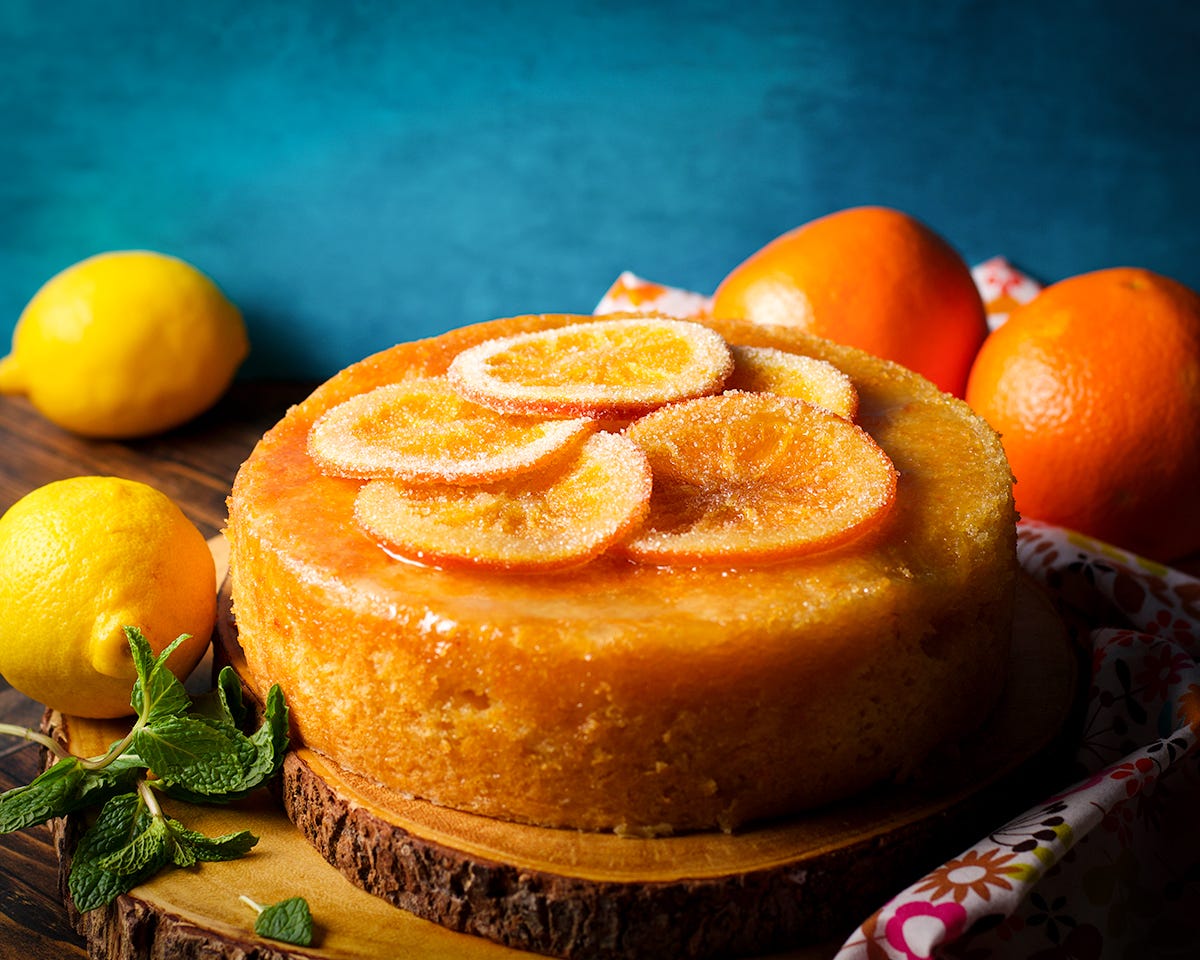
Including whole fruit in the batter allowed me to use less sugar because the fruit is helping to do sugar’s job: it adds flavor, locks in moisture, and creates a soft and tender texture. Less sugar means the cake is not overly sweet so you can drench it in citrus syrup with abandon and no concern for it becoming cloying.
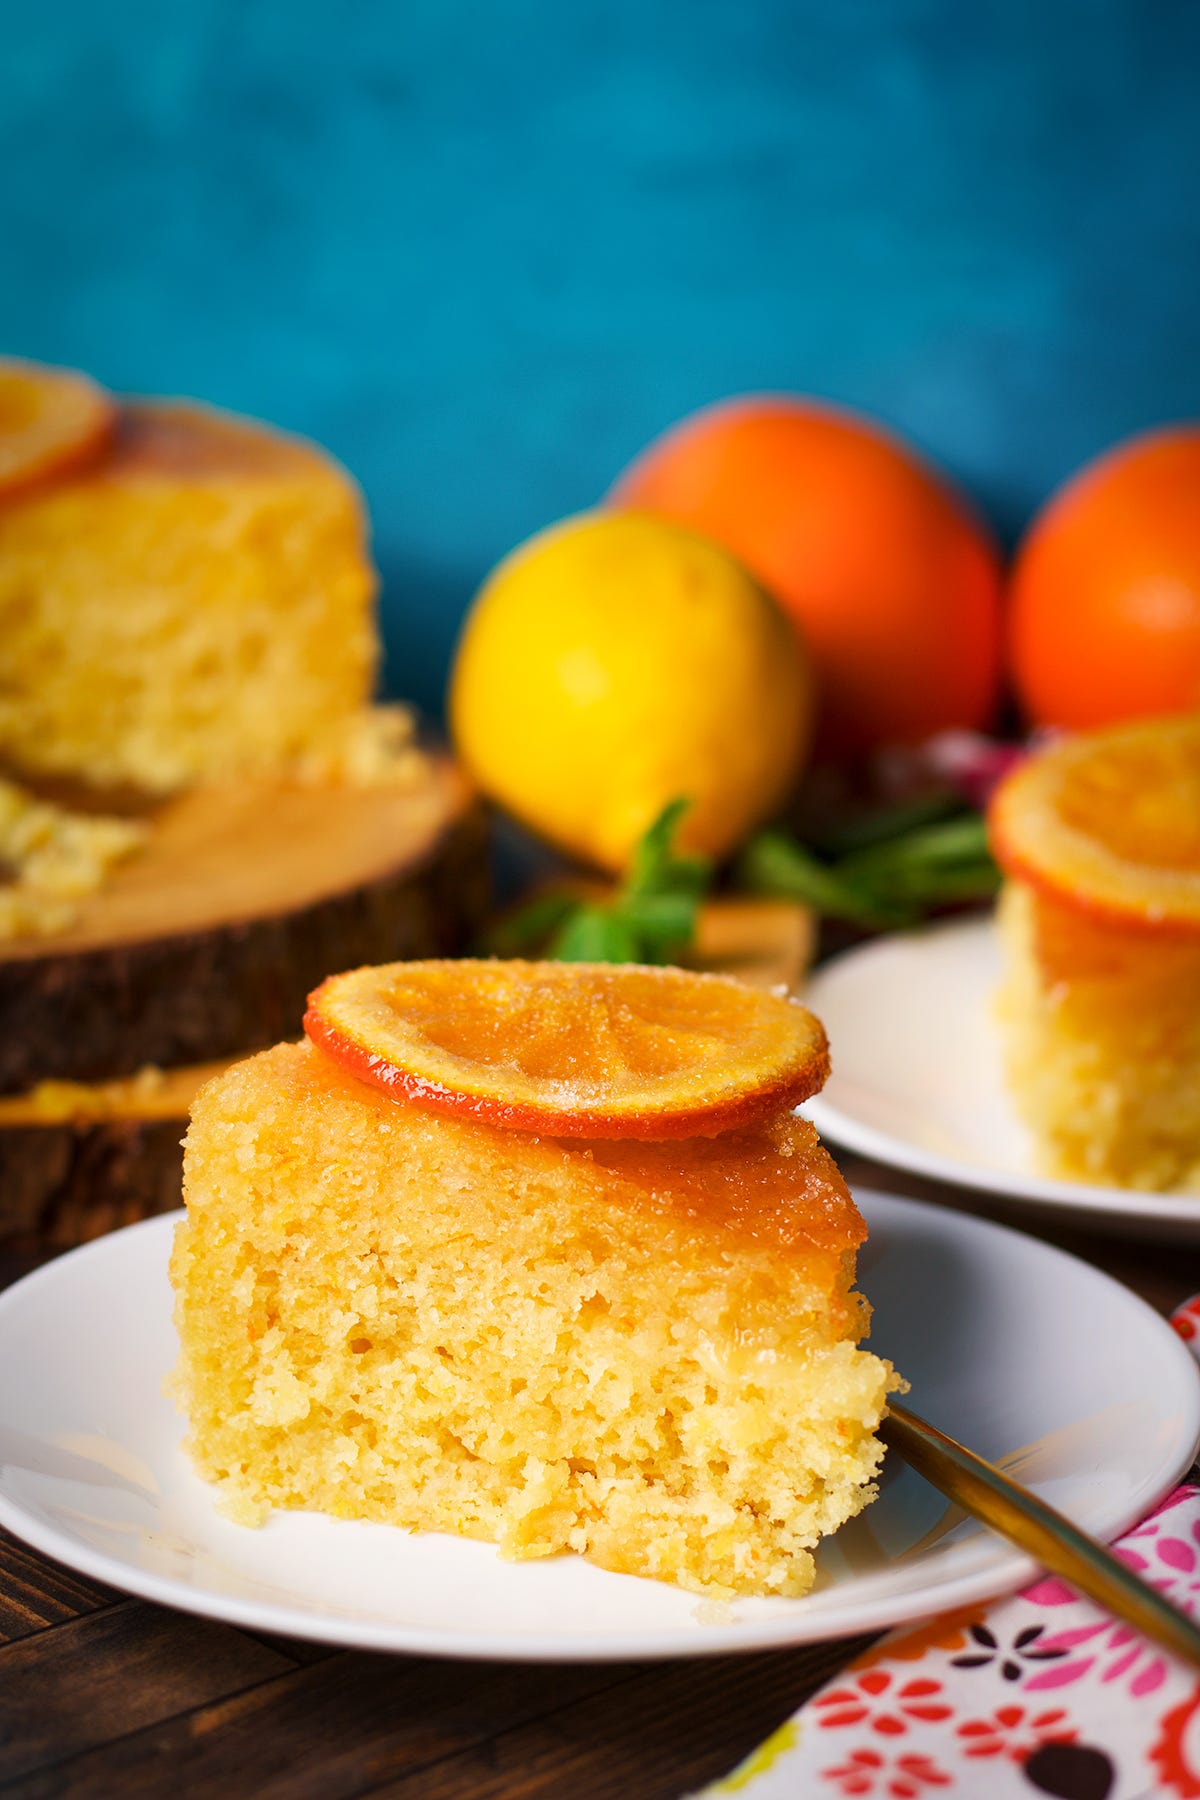
Step#1: The first step in making this cake is to make a few candied citrus slices. The process is super easy and involves little more than slicing up an orange (or lemon, lime, or grapefruit) and letting the slices simmer in sugar water.
The main advantage to making candied citrus slices is that you get two for the price of one:
You’ll have some pretty and delicious candied citrus slices with which to decorate your cake.
AND you’ll have the citrus drizzle syrup to pour over the top of the cake.
Since you only need a few citrus slices to decorate the cake and only about a cup of citrus syrup, you can cut the recipe in half if you like. Or, make the full amount and save the candied citrus slices and citrus simple syrup for another day. Regardless, do this the day before you want to bake this cake because the candied citrus slices need time to dry.
Step #2: How to prep the citrus fruit for the cake batter. This cake includes actual fruit, not just the juice and zest. To prepare the fruit, first use a zester to zest the fruit. You want about 2 tablespoons of citrus zest.
Then, use a sharp knife to cut the ends off the fruit so you can set it on your cutting board on a flat surface without it rolling around. Cut the peel, including the white part (the pith) from the fruit. Then use your knife to cut the fruit from the membranes that hold each segment. Not sure what I’m talking about here? Here’s a video of someone doing exactly this.
Place the fruit in a bowl, breaking it into small pieces. Try and contain the juice on your cutting board and pour that into the bowl. You want a total of 3/4 cup fruit and juice (175 grams). For the cake pictured here, I used two lemons and one orange.
Ingredients
Candied orange slices (or any kind of citrus fruit) and 1 cup of the citrus simple syrup left over from making candied orange slices as described above
2-3 lemons, oranges, limes, grapefruit, or any combination so that you have 3/4 cup (175 grams) fruit and juice (See instructions above.)
1 stick (8 tablespoons, 113 grams) unsalted butter, at room temperature
1/2 cup (60 grams) virgin coconut oil (to measure, use a spoon to pack it into a measuring cup)
1 cup (200 grams) granulated sugar
4 large eggs
1 3/4 cup (210 grams) cake flour
2 1/2 teaspoons baking powder
1 teaspoon salt kosher salt, OR 3/4 teaspoon table salt
1/4 cup (57 grams) milk or buttermilk
2 teaspoons pure vanilla extract
2 teaspoons lemon extract or 1 teaspoon lemon oil (more to taste)
Instructions:
Prep an 8-inch by 3-inch round cake pan: Coating the inside of the pan with vegetable shortening or butter, line the bottom of the pan with parchment paper, grease the top of the parchment paper with shortening or butter, then shake some flour around inside the pan so the bottom and sides are coated. Here are more instructions on preparing a cake pan so the cake will not stick.
Heat the oven to 325 degrees F.
Follow the instructions above to zest the citrus fruit and cut the fruit segments so you have 3/4 cup of fruit and juice. Add the fruit and juice to a small bowl and set aside.
Add the butter, coconut oil, sugar, and zest to a bowl and beat with an electric mixer until the mixture is very light and aerated, about 5 minutes. Add the eggs to the bowl one at a time, beating well to fully incorporate one egg into the butter and sugar mixture before adding another one. Stop every once in a while to scrape down the sides of the bowl.
Add the flour, baking powder, and salt to another bowl and use a wire whisk to mix. Add this mixture to the butter, sugar, and egg mixture and mix on low just until the flour is barely incorporated.
Stir 2 teaspoons vanilla extract and 1 teaspoon lemon extract (or 1/2 teaspoon lemon oil) into the buttermilk and add this to the batter. Mix on low speed just until barely incorporated.
Use a spoon to gently fold the fruit and juice into the batter.
Pour the batter into the prepared cake pan, smoothing out the top of the batter into a flat, even layer. Bake the cake in the center of the oven for 50-60 minutes. When done, the cake will be pulling away from the side of the cake pan. If you poke a toothpick into the center of the cake and remove it, there will be no signs of raw batter on the toothpick.
Allow the cake to cool in the pan for 5 minutes then gently flip it out onto a baking rack. Mix 1 teaspoon lemon extract or 1/2 teaspoon lemon oil into 1 cup of the citrus syrup reserved from making candied orange slices. Taste the syrup and add more lemon extract or lemon oil if you like.
Spoon about half of the citrus syrup over the cake and then leave the cake to cool. When the cake has cooled to room temperature, spoon the rest of the citrus syrup over the cake and then decorate with candied orange slices.
Serve in thick slices. For a little added luxury, serve with a dollop of lightly sweetened whipped cream or a scoop of vanilla ice cream. Well wrapped, the cake will keep at room temperature for up to 4 days.

BBQ chicken nachos
This was one of our kids favorite meals growing up. I almost always made it following a trip to Costco where I would purchase chips, grated, cheese, BBQ sauce, and a rotisserie chicken.
After getting everything from my Costco haul put away, I’d throw together a large tray of these nachos which, thanks to the precooked chicken, only took a few minutes. Who wants to spend a bunch of time in the kitchen after a family-sized grocery store run? Not this girl.
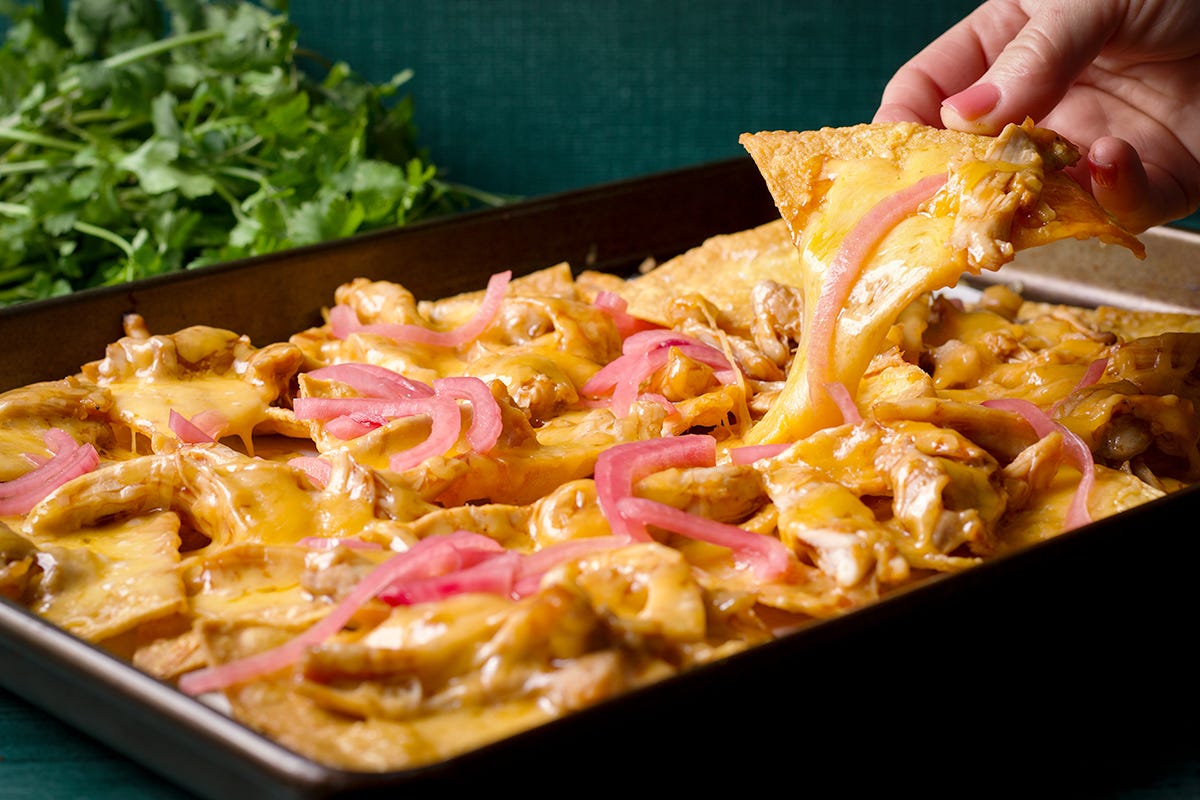
Now that it’s just my husband and I, I don’t make these nachos nearly as often. But every now and then they hit the spot. There is an endless number of ways to top these simple nachos, but I prefer to keep the whole thing pretty simple - just chips, cheese, BBQ chicken, and onions. Here’s how to make them:
Coat some pre-cooked chicken with your favorite bottled BBQ sauce. This is a great way to use up leftover chicken, or follow the super easy method for cooking chicken in Issue #1 to cook a package of boneless skinless chicken breasts or thighs. You can also just use a rotisserie chicken.
Heat the oven to 450 degrees F and line a rimmed baking sheet with parchment paper.
Spread some tortilla chips out onto the baking sheet (I usually made my own because it’s easy and they are so freaking delicious - here’s how to make homemade tortilla chips).
Scatter BBQ chicken over the chips and then add a generous amount of shredded cheese (cheddar, Monterey jack, pepper jack, or a grated Mexican blend).
Pop the baking sheet in the oven and cook until all the cheese is melted and bubbly.
Remove the baking sheet from the oven, scatter some quick pickled onions over the top of the nachos, then just dig in.
A great alternative to pickled onions is to cook a sliced red or yellow onion in some oil in a skillet until they are caramelized to a rich golden brown.

Two hearty, protein and nutrition packed ways to eat oatmeal
My husband and I don’t eat a lot of meat. We are not vegetarians or vegans, and do not follow any kind of restrictive diet, we just prefer to eat a lot more plants than animal products.
Because of this, I am often concerned about whether we get enough protein. After hearing an interview with Peter Attia, MD, the founder of Early Medical and author of Outlive: The Science and Art of Longevity, the amount of protein in our diets is even more of a concern. Protein is important at any age, but especially as we get older.
One of the ways I’ve been increasing the amount of protein we get without increasing the amount of meat we eat is by packing it into our morning oatmeal. What follows are two kinds of oatmeal we eat several times a week. They are packed with protein and fiber and are so freaking delicious it feels kind of like eating dessert for breakfast.
Blueberry oatmeal
I mean… the color alone will brighten up your morning. That gorgeous purple-blue color comes from the tremendous amount of blueberries I like to pack in there but use any kind of berries, or combination of berries.
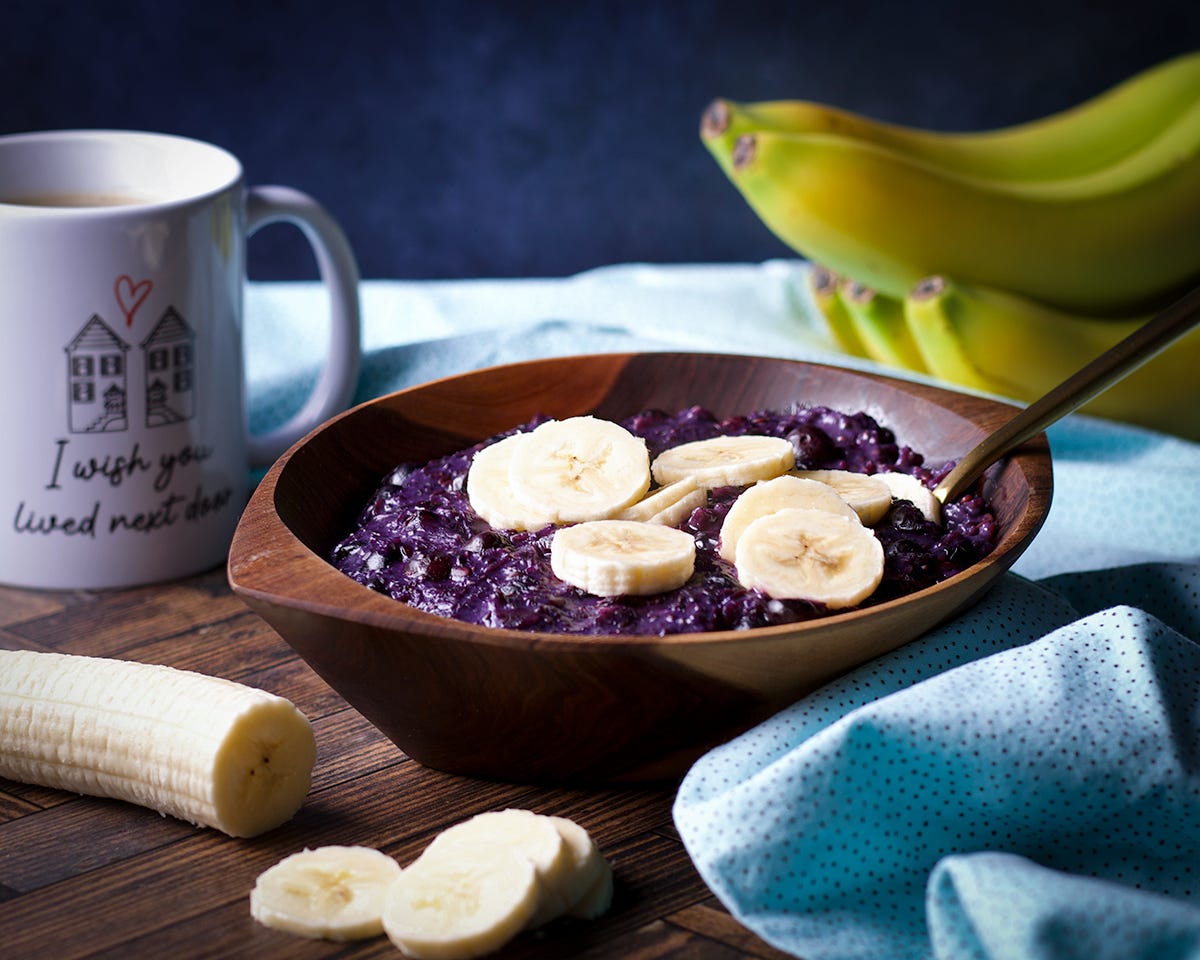
For 2 servings:
1 cup Old fashioned oats - I really like Bob’s Red Mill
about 1/4 cup Chia seeds
about 1/4 cup Flax seeds
2 cups plain, unsweetened almond milk (or any kind of non-dairy milk; different kinds have different amounts of protein)
A teaspoon or two of ground cardamom
A pinch or two of salt
About 1/3 of a cup of Stevia (or any kind of sweeter)
2 scoops of collagen powder (see note below)
3-4 cups frozen blueberries or any other kind or berry
Vanilla and/ or almond extract
Brown sugar, sliced banana, almonds, or anything else you’d like to top your oatmeal
Add all the ingredients except the extracts and toppings to a medium size saucepan and stir to mix. Set the pan over medium heat. When the oatmeal begins to boil, lower the heat and let it simmer gently for 8-10 minutes, stirring often.
Off heat, stir in a tablespoon of brown sugar (optional) and a few drops of vanilla and almond extract. Top with sliced bananas, almonds, or anything else you like. If you’re a coconut lover, use coconut milk in the oatmeal and top with sweetened shredded coconut, toasted or raw. If it’s berry season, top with additional fresh berries.
Chocolate peanut butter oatmeal
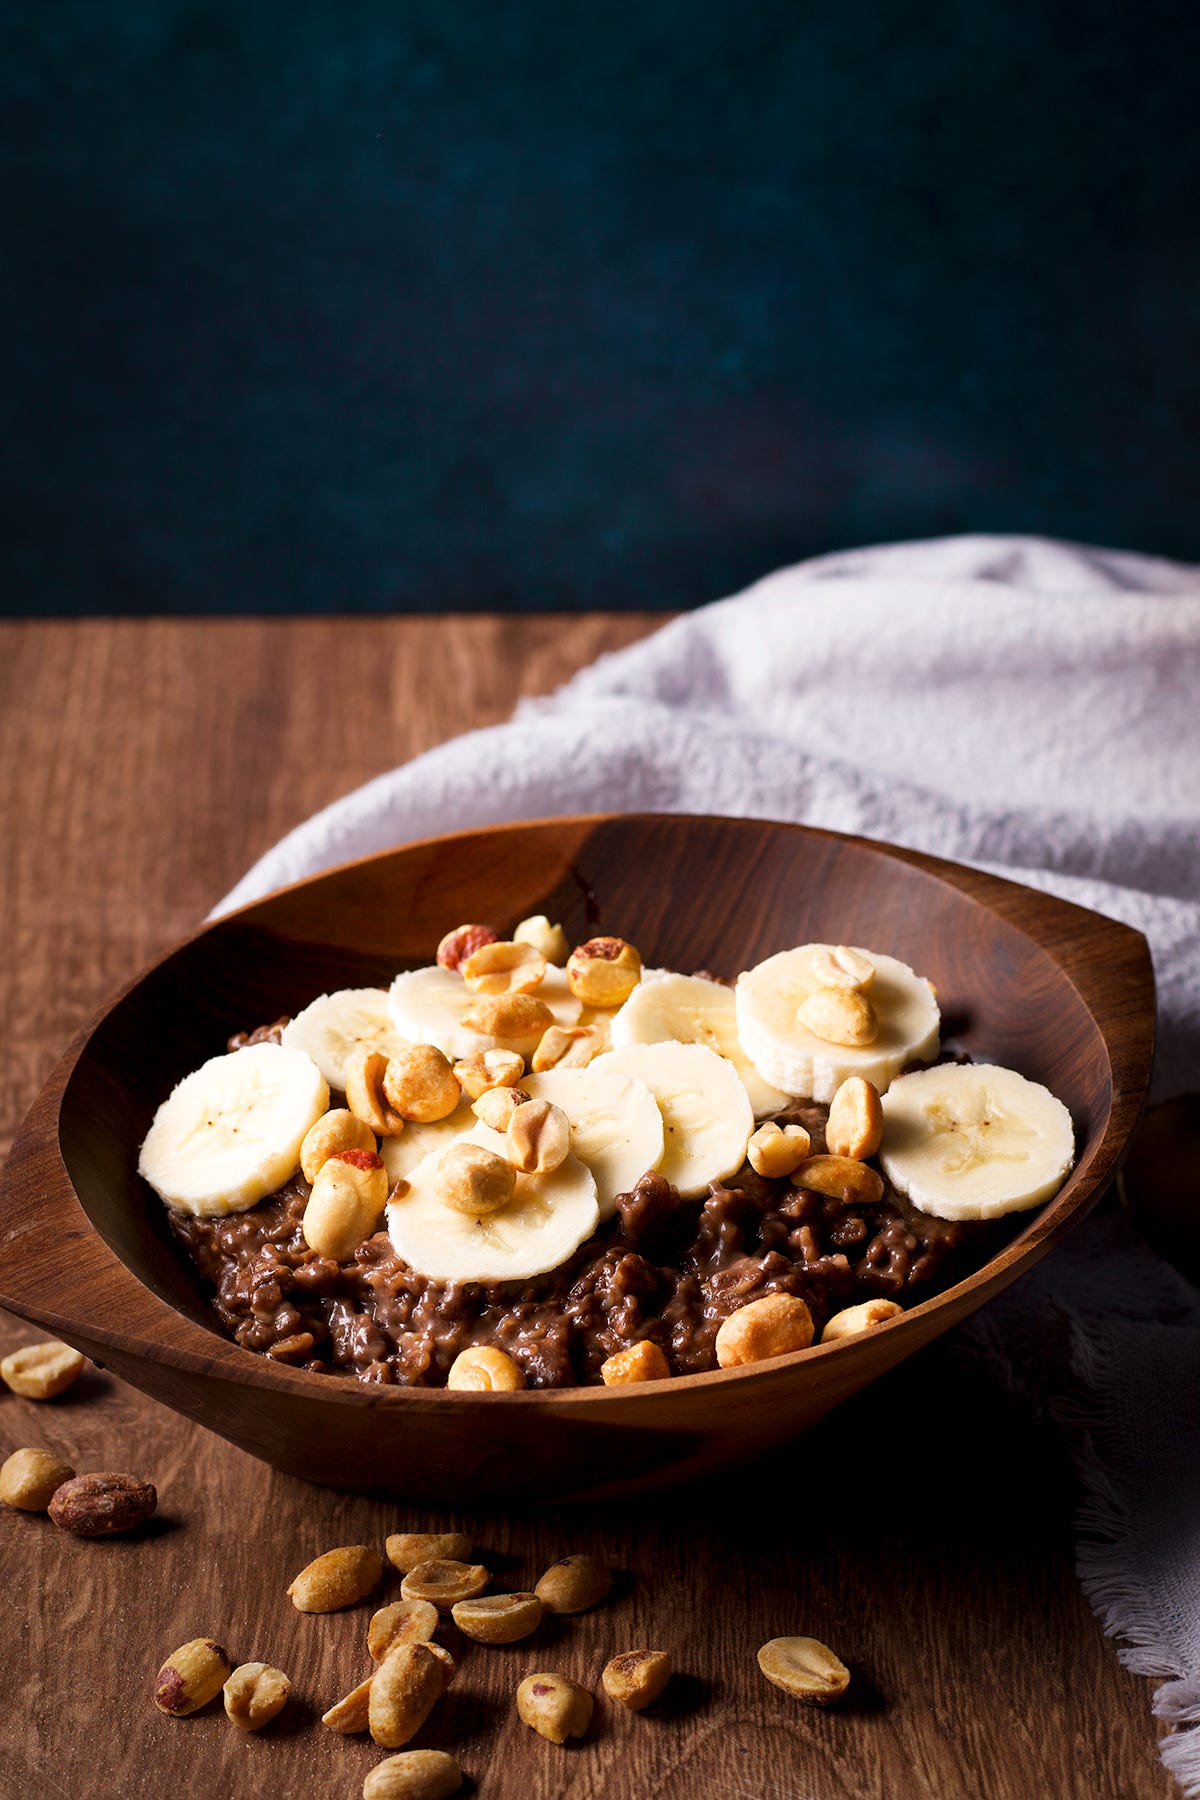
1 cup Old fashioned oats
About 1/4 cup Chia seeds
About 1/4 cup peanut butter
2 1/2 cups Chocolate Almond milk
A pinch or two of salt
2 scoops of collagen powder (see note below)
Top with sliced bananas and roasted peanuts
Add everything except the sliced bananas and roasted peanuts to a medium size saucepan and set it over medium heat. When the oatmeal begins to boil, lower the heat and let it simmer gently for 8-10 minutes, stirring often. Top bowls of oatmeal with a sliced banana and a handful of peanuts.
Recipe notes:
I’ve been playing around with adding collagen to our diet but I have no idea at this point if it’s worth it. One thing to remember is that collagen isn’t a complete protein. Oatmeal contains the amino acids that collagen is lacking, so eating them both together seems like a good idea. Chia seeds are also a complete protein.
The blueberry oatmeal comes in at just under 600 calories and contains 22 grams of fiber and 26 grams of protein. The protein, fiber, and calorie count will increase with the toppings - bananas, nuts and seeds all include both.
The chocolate peanut butter oatmeal comes in at 640 calories and contains 28 grams of protein and 15 grams of fiber. The protein, fiber, and calorie count will increase if you top your oatmeal with a sliced banana and a handful of peanuts.

This month’s cookbook is How to Dress an Egg by Ned Baldwin and Peter Kaminsky.
This week I made roasted carrots with ricotta and pumpkin seeds. This is a supremely simple recipe in which you roast carrots in a dutch oven then serve them over a salted ricotta, sprinkled with toasted pumpkin seeds and drizzled with honey.
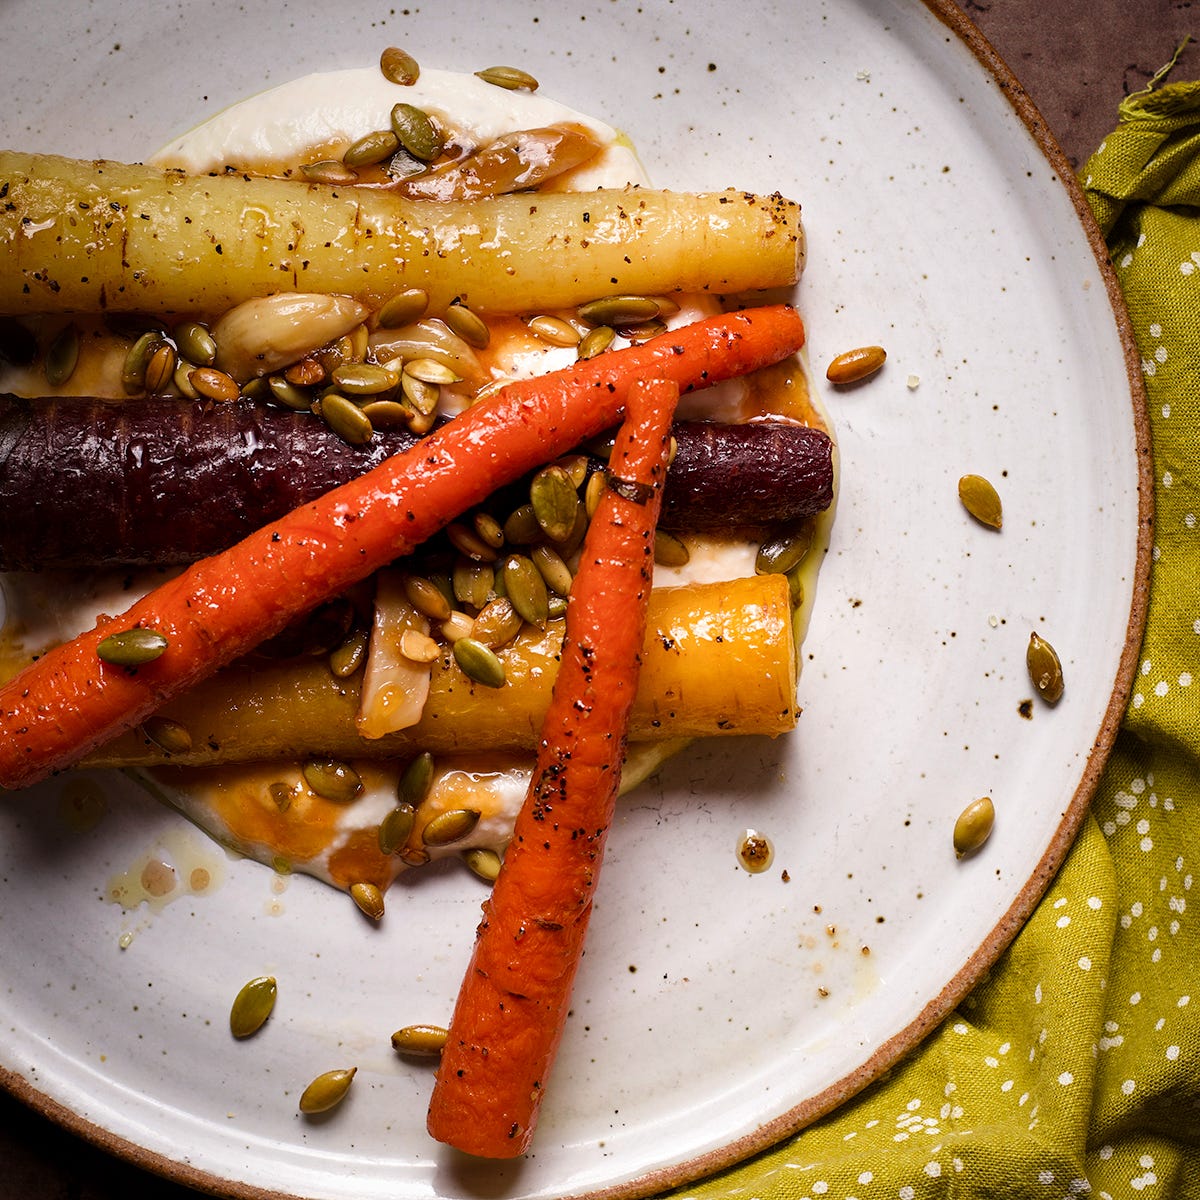
I modified the recipe slightly, adding some fresh tarragon and garlic cloves to the carrots as they roasted and using hot honey instead of regular honey. The combination of crisp-tender carrots, roasted garlic, creamy ricotta, salty seeds, and spicy-sweet honey was absolutely delicious.
If you’ve been intrigued by the recipes you’ve seen this month from this book, I encourage you to pick up a copy. The book is organized around several cornerstone recipes from which every other recipe is a spinoff.
For example, this dish of roasted carrots and ricotta is a spin off from the basic roasted carrots recipe. It’s a layout that I’ve really enjoyed both because of its simplicity and because of the way it encourages improvisation.
What I’m reading, watching, and listening to
Steve and I recently listened to The Making of Another Major Motion Picture Masterpiece by Tom Hanks on Audible. Hanks writes like a screenwriter - with enough detail to picture every second of every scene and a crazy amount of contextual and historical detail about every character. It’s a well written book, and one we both enjoyed listening to (it’s narrated by Hanks) but I am not joking when I say there is a LOT of detail. We listened to it while driving back and forth from Seattle and Denver and it’s a great road trip book but if you’re looking for a fast moving story, this isn’t it.
Over the past year I’ve gotten increasingly into yoga. I started out sporadically fumbling my way through YouTube yoga videos and have gradually worked my way up to an hour a day practice. I am at the tip of the iceberg in my understanding of the extreme depth and breadth of yoga but have enough of a glimpse of what’s possible to fuel my practice and motivate me forward.
One book that’s deepened my understanding of yoga is Bringing Yoga To Life by Donna Farhi. This book was a slow start for me. I’d read a few pages and then put it down and not pick it back up again for a week or two, then read some more and put it down and so on, until one day I began to connect her words with what was happening on my mat.
I cannot tell you how that connection came about, but once there, it deepened my physical yoga practice and increased my interest in the book itself. Learning is funny that way, isn’t it? We stumble around in the dark, then all of the sudden the light clicks on and we get it.
What about you, friends? What are you reading, watching, and listening to these days? Do you have anything to recommend?
Thanks for reading! If you are enjoying this newsletter, please tell your friends! Referrals earn free issues!
If you make something from this issue, snap a photo and send it to me at rebecca@rebeccablackwell.com! I’ll publish your photo in next week’s issue!
That’s my mom!!!